Ensuring your online safety is paramount, and one crucial aspect is maintaining a secure connection while browsing. In this article, we will explore the step-by-step process to check and rectify any unsafe connections when using Google Chrome. By empowering yourself with these simple techniques, you can navigate the web with confidence and protect your digital well-being.
Understanding the “Not Secure” Warning in Browsers
When you see the “Not Secure” warning in your browser, it means the website you’re visiting doesn’t have a secure connection. This can put your personal information at risk. To check and fix an unsafe connection in Chrome, follow these steps:
1. Look for the “Not Secure” warning in the address bar. It may appear as a padlock with a red strike-through or a gray information icon.
2. Click on the warning to get more details about the security issue.
3. If you’re on a website that requires sensitive information, like passwords or credit card details, it’s best to avoid entering any data until the connection is secure.
4. To fix the unsafe connection, try adding “https://” before the website URL. This forces a secure connection and encrypts your data.
5. If the website still shows the warning, it’s possible that the site doesn’t have a valid SSL certificate. In this case, it’s advisable to avoid entering any personal information.
Remember, securing your connection is essential to protect your privacy online. Use these steps to ensure a safe browsing experience.
Causes and Variations of the “Your Connection Is Not Private” Error
The “Your Connection Is Not Private” error in Chrome can occur due to various reasons, leading to concerns about the security of your connection. Here are some common causes and variations of this error:
1. Expired or Invalid SSL Certificate: If the website’s SSL certificate has expired or is not valid, Chrome will display this error message. It’s crucial to ensure the website’s SSL certificate is up to date and properly installed.
2. Incorrect Date and Time Settings: Incorrect date and time settings on your device can cause SSL errors. Make sure your device’s date and time are accurate.
3. Browser Extensions and Antivirus Software: Certain browser extensions or antivirus software can interfere with SSL certificates, resulting in this error. Disable any extensions or software temporarily to check if they are causing the issue.
4. Network Configuration Issues: Problems with your network configuration can trigger SSL errors. Try resetting your router or contacting your network administrator for assistance.
To fix your “Your Connection Is Not Private” error in Chrome, consider the following steps:
1. Check SSL Certificate: Ensure the website’s SSL certificate is valid and up to date.
2. Adjust Date and Time Settings: Correct the date and time settings on your device.
3. Disable Extensions and Software: Temporarily disable any browser extensions or antivirus software that may be causing the error.
4. Verify Network Configuration: Reset your router or seek help from your network administrator to resolve any network configuration issues.
Remember, it’s essential to prioritize your online security by addressing these errors promptly and ensuring a fully secure browsing experience.
Troubleshooting Steps for Fixing the Error
- Clear Browsing Data
- Open Chrome browser.
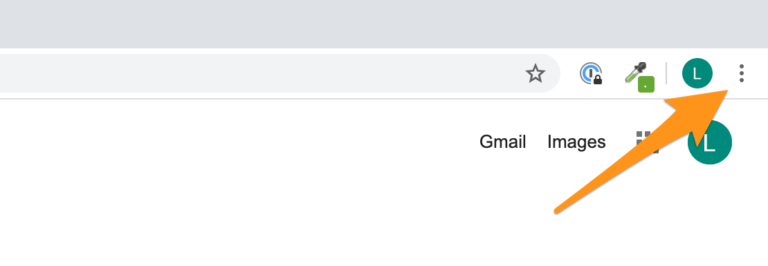
- Click on the three-dot menu icon in the top right corner.
- Select “More tools” and then “Clear browsing data”.
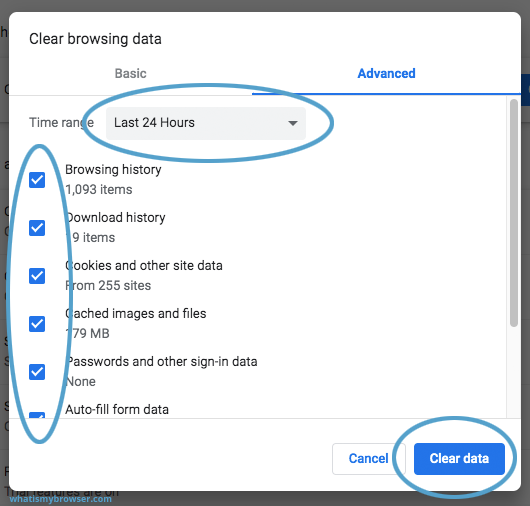
- In the popup window, choose the time range for which you want to clear the data.
- Check the boxes for the types of data you want to delete (e.g., browsing history, cookies, cached images).
- Click on the “Clear data” button to delete the selected data.
- Disable Extensions
- Open Chrome browser.
- Click on the three-dot menu icon in the top right corner.
- Select “More tools” and then “Extensions”.
- Toggle off the switch next to each extension to disable them temporarily.

- Restart Chrome and check if the error persists.
- Reset Chrome Settings
- Open Chrome browser.
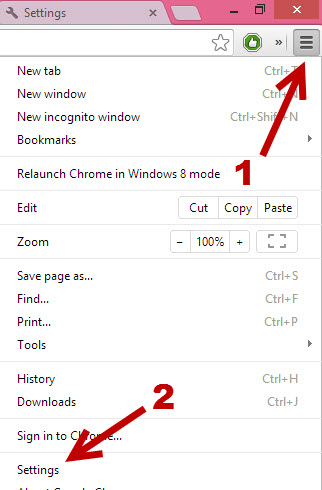
- Click on the three-dot menu icon in the top right corner.
- Select “Settings” and scroll down to the bottom.
- Click on “Advanced” to expand the advanced settings.
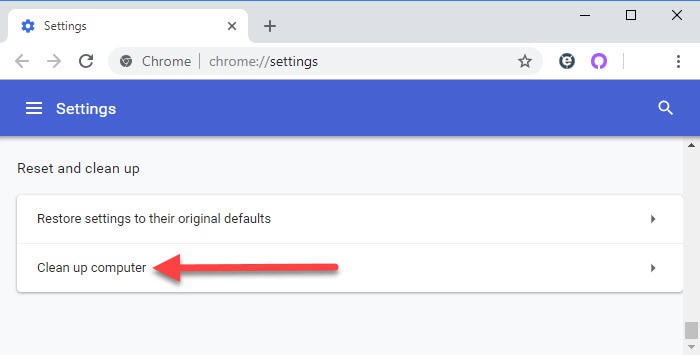
- Scroll down to the “Reset and clean up” section.
- Click on “Restore settings to their original defaults”.
- Click on the “Reset settings” button in the confirmation popup.
- Update Chrome
- Open Chrome browser.
- Click on the three-dot menu icon in the top right corner.
- Select “Help” and then “About Google Chrome”.
- Chrome will automatically check for updates and install them if available.
- Restart Chrome after the update process is complete.
- Disable Antivirus or Firewall Temporarily
- Open the antivirus or firewall software on your computer.
- Locate the settings or preferences section.
- Disable the antivirus or firewall temporarily.
- Restart Chrome and check if the error is resolved.
- Remember to re-enable the antivirus or firewall after troubleshooting.
Tips for Website Owners/Administrators
- Open Google Chrome.
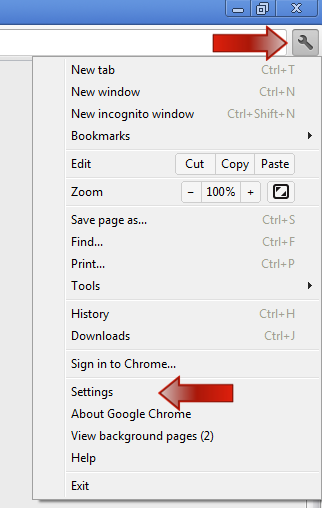
- Click on the three vertical dots at the top-right corner of the browser window to open the menu.

- Select “Settings” from the drop-down menu.
- Scroll down and click on “Advanced” to expand advanced settings.
- Under the “Privacy and security” section, click on “Clear browsing data”.
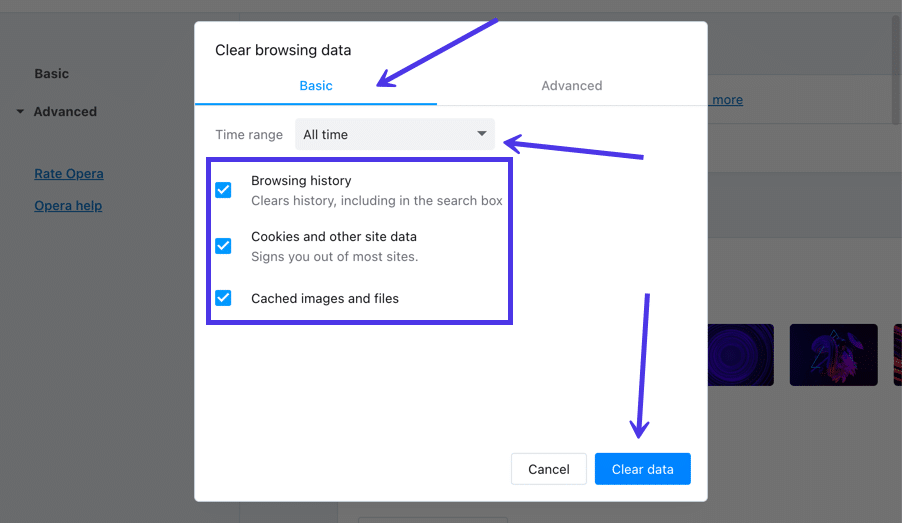
- In the “Basic” tab, choose a time range for which you want to clear the data. For example, select “All time” to clear all browsing data.
- Check the boxes next to the types of data you want to clear, such as browsing history, cookies, and cached images and files.
- Click on the “Clear data” button to delete the selected browsing data.
Repair Method 2: Disable Browser Extensions
- Open Google Chrome.
- Click on the three vertical dots at the top-right corner of the browser window to open the menu.
- Select “More tools” from the drop-down menu.
- Click on “Extensions” to open the extensions page.
- Toggle off the switch next to each extension to disable it.
- Restart Chrome to apply the changes.

Repair Method 3: Reset Chrome Settings
- Open Google Chrome.
- Click on the three vertical dots at the top-right corner of the browser window to open the menu.
- Select “Settings” from the drop-down menu.
- Scroll down and click on “Advanced” to expand advanced settings.
- Scroll down to the “Reset and clean up” section.
- Click on “Restore settings to their original defaults”.
- A pop-up window will appear, click on the “Reset settings” button to confirm.
Repair Method 4: Update Chrome
- Open Google Chrome.
- Click on the three vertical dots at the top-right corner of the browser window to open the menu.
- Select “Help” from the drop-down menu.
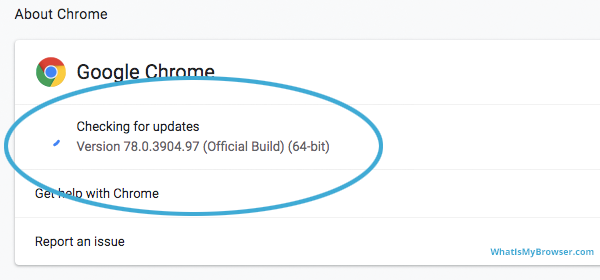
- Click on “About Google Chrome”.
- Chrome will automatically check for updates and install them if available.
- After the update is complete, restart Chrome to apply the changes.

Tips for Website Visitors
- Clear browsing data:
- Open Chrome browser.
- Click on the three-dot menu icon in the top right corner.
- Select More Tools and then Clear browsing data.
- In the pop-up window, choose the time range and select the types of data you want to delete.

- Click on the Clear data button to confirm.
- Disable browser extensions:
- Click on the three-dot menu icon in the top right corner of Chrome.
- Select More Tools and then Extensions.

- In the Extensions tab, toggle off the switch next to each extension to disable them.
- Restart Chrome to apply the changes.
- Disable Chrome flags:
- Type chrome://flags in the address bar and press Enter.
- Search for the flag named “Enable QUIC protocol”.
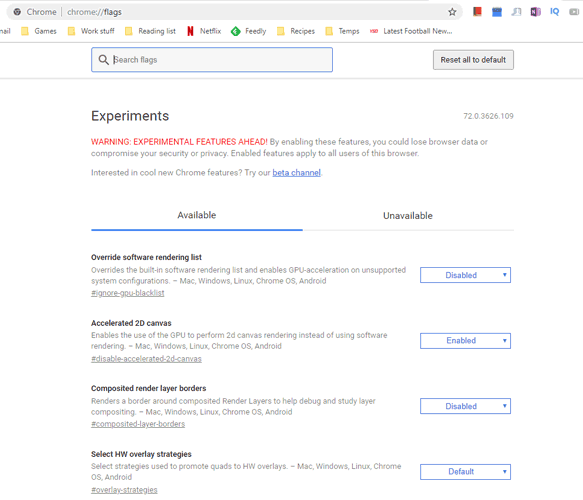
- Select Disabled from the drop-down menu.
- Relaunch Chrome for the changes to take effect.
- Reset Chrome settings:
- Open Chrome and click on the three-dot menu icon in the top right corner.
- Select Settings.

- Scroll down and click on Advanced to expand the advanced settings.
- Scroll down to the Reset and clean up section and click on Restore settings to their original defaults.
- Click on the Reset settings button to confirm.
- Update Chrome:
- Open Chrome and click on the three-dot menu icon in the top right corner.
- Select Help and then About Google Chrome.
- Chrome will automatically check for updates and install them if available.
- Restart Chrome to complete the update.
Updates on the Issue (October 2021 – November 2022)
Microsoft has been actively working on resolving the unsafe connection issue in Chrome. We understand the importance of ensuring a fully secure browsing experience for our users.
To fix your connection issue, follow these steps:
1. Update to the latest version of Chrome: Keeping your browser up to date is crucial for enhanced security. Go to the Chrome menu, click on “Help,” and select “About Google Chrome” to check for updates.
2. Clear your browsing data: Sometimes, cached data can interfere with secure connections. Open Chrome settings, go to “Privacy and security,” and click on “Clear browsing data.” Make sure to select “Cached images and files” and click “Clear data.”
3. Disable extensions: Certain extensions can cause conflicts with secure connections. Click on the puzzle piece icon in the top-right corner of Chrome, and disable any extensions that you suspect might be causing the issue.
4. Check your system’s date and time: Incorrect date and time settings can lead to SSL errors. Ensure that your system’s date and time are accurate.
By following these steps, you can address the unsafe connection issue in Chrome and enjoy a secure browsing experience. For more information, visit the Microsoft Support website.
Important Considerations Regarding SSL Certificates
When it comes to SSL certificates, there are a few important considerations to keep in mind. First, ensure that the certificate is valid and not expired. Expired certificates can lead to security issues and SSL errors. Additionally, make sure that the certificate is issued by a trusted certificate authority (CA). Trusted CAs are recognized by major browsers like Chrome and Microsoft Edge, reducing the risk of security warnings. If you encounter an SSL error or secure warning, try clearing your browser cache or updating your browser to the latest version. On Mac, you can do this by going to the “Chrome” menu, selecting “Clear Browsing Data,” and checking the appropriate boxes. In some cases, you might need to bypass the secure warning to access a specific website. However, exercise caution when doing so as it can compromise your online security. By keeping these considerations in mind, you can ensure a secure browsing experience.
Additional Resources and Support
- Microsoft Safety Scanner: A free online tool to scan for and remove malware from your Windows devices.
- Windows Defender SmartScreen: A built-in security feature in Windows 10 that helps protect against phishing and malicious websites.
- Microsoft Support: Access the official Microsoft support website for troubleshooting guides, forums, and assistance with any technical issues.
- Google Safe Browsing: Enable this feature in Chrome settings to get warnings about potentially dangerous websites.
- Chrome Cleanup Tool: A specialized tool by Google to remove software that may cause issues with Chrome, including unwanted ads and malware.
- HTTPS Everywhere: Install this browser extension to automatically switch websites to a secure HTTPS connection whenever possible.
- Updating Chrome: Ensure that you have the latest version of Chrome installed to benefit from the latest security updates and bug fixes.