Troubleshooting technology can be a daunting task, especially when seemingly simple issues arise. In this article, we delve into the frustrating problem of HP monitor USB ports not functioning properly, and provide you with effective solutions to get them up and running again.
Troubleshooting a USB Connection
If you’re experiencing issues with your HP monitor’s USB port, follow these troubleshooting steps to resolve the problem:
1. Check the USB Connection: Ensure that the USB cable is securely connected to both the monitor and the computer.
2. Restart Your Computer: Sometimes, a simple restart can fix USB connection issues. Restart your computer and see if the problem persists.
3. Update USB Drivers: Visit the USB device manufacturer’s website and download the latest drivers for your USB device. Install them according to the manufacturer’s instructions.
4. Reset USB Ports: Unplug all USB devices from your computer and then restart it. After the restart, plug the USB devices back in one by one to test if they’re working properly.
5. Remove USB Hubs: If you’re using USB hubs, try connecting your USB devices directly to your computer’s USB ports instead. Sometimes, USB hubs can cause connectivity problems.
6. Test on Another Computer: Connect your HP monitor to another computer to see if the USB port works on a different system. This will help determine if the issue is with the monitor or the computer.
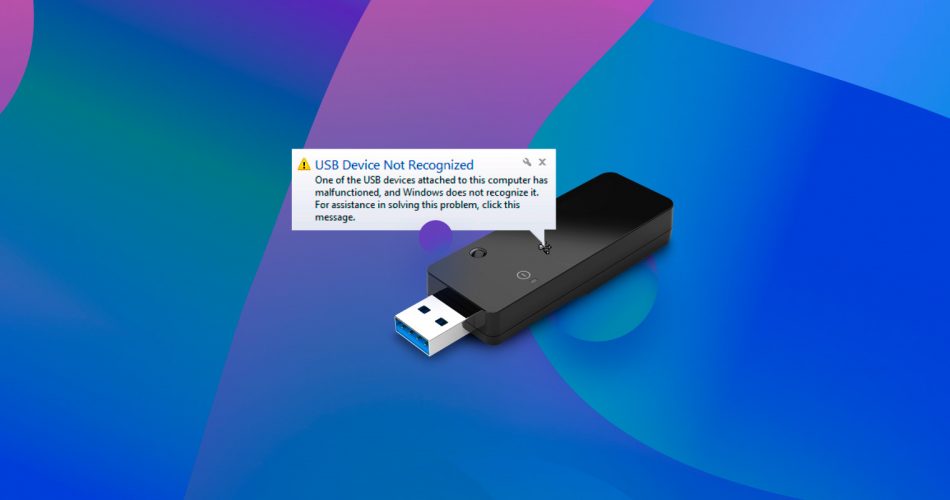
USB Devices Not Detected by Windows
If your USB devices are not being detected by Windows when connected to your HP Monitor USB port, follow these steps to resolve the issue:
1. Check the physical connections: Ensure that the USB cable is securely plugged into both the monitor and your computer.
2. Verify USB functionality: Connect the USB device to a different USB port on your computer to confirm if it’s working properly.
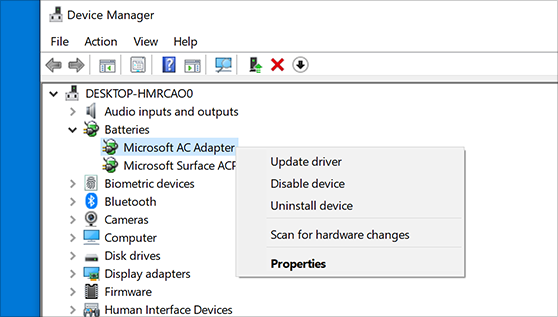
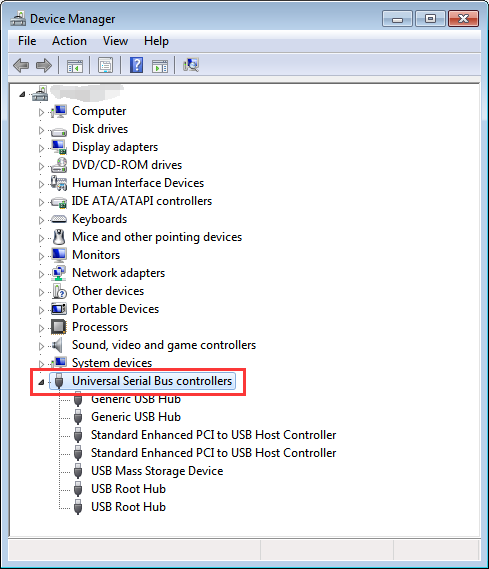
3. Update USB drivers: Go to the device manager, locate the Universal Serial Bus controllers, and right-click on each USB driver to select “Update driver.”
4. Restart your computer: Sometimes a simple restart can solve the issue by refreshing the USB connections.
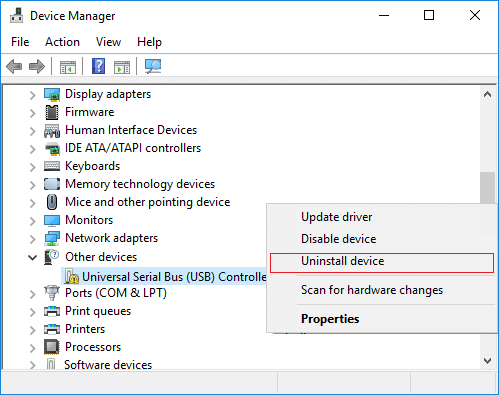
5. Reset USB ports: Open Device Manager, expand the Universal Serial Bus controllers, right-click on each USB Root Hub, and select “Uninstall device.” Restart your computer and let Windows reinstall the USB drivers automatically.
6. Disable USB Selective Suspend: Open the power options settings, click on “Change plan settings,” then “Change advanced power settings.” Expand the “USB settings” and set “USB selective suspend setting” to “Disabled.”
USB Storage and Memory Card Issues
If you’re experiencing issues with the USB port on your HP monitor, follow these troubleshooting tips to get it working again.
1. Check the connections: Ensure that the USB cable is securely connected to both the monitor and your device.
2. Restart your computer: Sometimes a simple restart can resolve USB connection issues.
3. Update drivers: Visit the HP website and download the latest drivers for your monitor.
4. Reset USB settings: Open Device Manager, expand the “Universal Serial Bus controllers” category, right-click on each USB Root Hub, and select “Uninstall device”. Restart your computer to reinstall the USB drivers.
5. Test the USB port: Connect a different USB device, such as a printer or camera, to the port to see if it works. If it does, the issue may be with your original device.
If none of these steps resolve the issue, contact the USB device manufacturer for further assistance.
Remember to always follow manufacturer instructions and be cautious when troubleshooting USB issues.
(Source: HP Monitor USB Port Not Working [SOLVED])
Front USB Ports Not Working on Desktop
If the front USB ports on your desktop are not working, try following these troubleshooting tips:
1. Check the USB connections: Ensure that the USB cable is securely connected to both the desktop and the device you are trying to connect.
2. Update USB device software: Visit the manufacturer’s website and download the latest drivers or software for your USB device.
3. Restart the computer: Sometimes a simple restart can fix USB connectivity issues.
4. Check for errors in Device Manager: Press Windows key + X, then select Device Manager. Look for any exclamation marks or error messages next to the USB devices. Right-click on them and select “Update driver.”
5. Reset USB ports: Open the document and find the section that contains the code “// Reset USB Ports.” Copy and paste the code into the document’s console.
6. Clear cache and cookies: Press Ctrl + Shift + Delete to open the Clear browsing data window. Choose to clear cache and cookies.
If none of these steps solve the issue, it may be a hardware problem. Contact the manufacturer for further assistance.
Slow or Unresponsive Mouse
If you’re experiencing a slow or unresponsive mouse while using an HP monitor with a non-working USB port, we have a solution for you. Here’s a step-by-step guide to fix the issue:
1. First, ensure that your HP monitor is connected properly to your computer’s USB port.
2. Open your preferred web browser and go to the HP website.
3. Search for your specific monitor model in the support section.
4. Look for the installation documentation or manufacturer instructions for your monitor.
5. Follow the instructions to download and install any necessary USB device software or driver updates.
6. If the issue persists, try using a different USB port on your computer or a different USB cable.
7. You can also try resetting the USB ports on your computer by following these steps:
– Press the Windows key + X on your keyboard and select “Device Manager.”
– Expand the “Universal Serial Bus controllers” section.
– Right-click on each USB Root Hub and select “Uninstall device.”
– Restart your computer, and Windows will automatically reinstall the USB drivers.
8. If all else fails, contact HP support for further assistance.
USB Ports on Monitor Not Working
If the USB ports on your HP monitor are not working, follow these steps to resolve the issue:
1. Check the connection: Ensure that the USB cable is securely connected to both the monitor and the computer.
2. Update the drivers: Go to the HP website and download the latest drivers for your monitor. Install them and restart your computer.
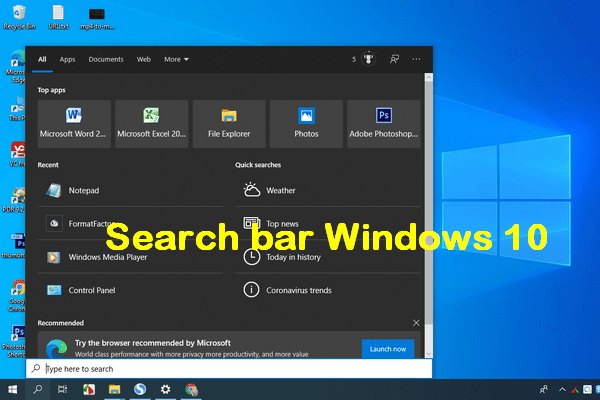
3. Troubleshoot USB devices: In Windows 10, click on the Start button, then go to Settings > Devices > USB. Run the troubleshooter and follow the instructions.
4. Reset USB ports: Unplug all USB devices from your computer, then restart it. After the restart, plug in the USB devices one by one to see if they are recognized.
5. Reset the monitor: Disconnect the power cable from the monitor, then press and hold the power button for 10 seconds. Reconnect the power cable and turn on the monitor.
If these steps do not solve the issue, consult the HP installation documentation or contact HP support for further assistance.
USB Devices Not Recognized on Monitor
If you’re experiencing issues with USB devices not being recognized on your HP monitor, we have a solution for you. Follow these steps to resolve the problem:
1. Start by checking the USB connection. Make sure the cable is securely plugged into both the monitor and the device.
2. Restart your computer. Sometimes a simple restart can fix the issue.
3. Update your USB drivers. Go to the manufacturer’s website and download the latest drivers for your USB ports.
4. Try using a different USB port on your monitor. Sometimes certain ports may not be functioning properly.
5. If none of the above solutions work, try resetting the monitor’s USB ports. To do this, unplug the monitor from power, wait for a few seconds, and then plug it back in.
These steps should help resolve the issue of USB devices not being recognized on your HP monitor. If you continue to experience problems, it may be worth contacting HP support for further assistance.
Methods to Fix USB Issues on Monitor
- Ensure the USB cable is properly connected to both the monitor and the computer.
- If using a USB hub, make sure it is also properly connected to the monitor and the computer.
- Try connecting the USB cable to a different USB port on the computer to verify if the port is faulty.
Method 2: Update USB Drivers
- Open Device Manager by pressing Win + X and selecting Device Manager from the list.
- Expand the Universal Serial Bus controllers category.
- Right-click on each USB device and select Update driver.
- Choose the option to Search automatically for updated driver software.
- Follow the on-screen instructions to complete the driver update process.
Method 3: Restart USB Hub
- Open Device Manager by pressing Win + X and selecting Device Manager from the list.
- Expand the Universal Serial Bus controllers category.

- Right-click on the USB hub that is connected to the monitor and select Disable device.
- Wait for a few seconds and then right-click on the same USB hub and select Enable device.
- Check if the USB port on the monitor is now functioning properly.
Method 4: Uninstall USB Controllers
- Open Device Manager by pressing Win + X and selecting Device Manager from the list.
- Expand the Universal Serial Bus controllers category.
- Right-click on each USB controller and select Uninstall device.
- Restart the computer.

- Windows will automatically reinstall the USB controllers on startup.
Method 5: Disable USB Selective Suspend
- Open Control Panel by searching for it in the Start menu.
- Select Power Options.
- Click on Change plan settings next to the selected power plan.
- Click on Change advanced power settings.
- Expand the USB settings category.
- Expand the USB selective suspend setting option.
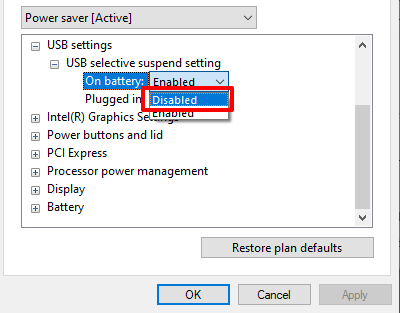
- Set both the On battery and Plugged in options to Disabled.
- Click Apply and then OK to save the changes.
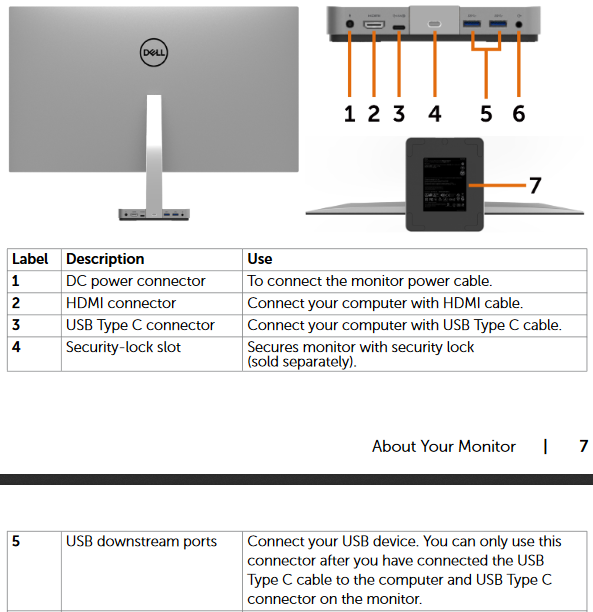
Different USB Connector Types
HP Monitor USB Port Not Working [SOLVED]
If you are facing issues with your HP monitor’s USB port, it is important to understand the different USB connector types available. Here is a table outlining the various USB connector types:
| USB Connector Type | Description |
|---|---|
| USB Type-A | The most common USB connector, usually found on computers and laptops. |
| USB Type-B | Typically used for connecting printers, scanners, and other peripherals. |
| Micro USB | A smaller USB connector commonly used for smartphones, tablets, and other portable devices. |
| Mini USB | An older, larger USB connector type often found on older digital cameras and game controllers. |
| USB Type-C | The latest USB connector type, known for its reversible design and high data transfer speeds. |
Understanding these different USB connector types can help you troubleshoot and identify any compatibility issues with your HP monitor’s USB port.
If you are still experiencing problems with your HP monitor’s USB port, it is recommended to consult the user manual or contact HP customer support for further assistance.
Speed Standards of USB
Speed Standards of USB
| USB Version | Speed |
|---|---|
| USB 1.0 | Low Speed: 1.5 Mbps |
| USB 1.1 | Full Speed: 12 Mbps |
| USB 2.0 | High Speed: 480 Mbps |
| USB 3.0 | SuperSpeed: 5 Gbps |
| USB 3.1 | SuperSpeed+: 10 Gbps |
| USB 3.2 | SuperSpeed+: 20 Gbps |
USB (Universal Serial Bus) is a widely-used interface for connecting various devices to a computer. It offers different speed standards depending on the USB version. In the context of a HP monitor USB port not working, understanding these speed standards can help diagnose and troubleshoot the issue.
Frequently Asked Questions about USB Ports
- Check USB connections:
- Ensure that the USB cable is properly connected to both the monitor and the computer.
- If using a USB hub, ensure that it is also properly connected.
- Test the USB port:
- Try connecting a different device to the USB port on the monitor to see if it is recognized.
- If the device is recognized, the problem may be with the original device or its drivers.
- If the device is not recognized, proceed to the next step.
- Update USB drivers:
- Open the Device Manager by pressing Windows Key + X and selecting “Device Manager.”
- Expand the “Universal Serial Bus controllers” category.
- Right-click on each USB controller listed and select “Update driver.”
- Follow the on-screen instructions to update the drivers.
- Restart the computer:
- Close all programs and save your work.
- Click on the “Start” button and select “Restart.”
- Allow the computer to fully restart.
- Check power management settings:
- Right-click on the “Start” button and select “Device Manager.”
- Expand the “Universal Serial Bus controllers” category.
- Right-click on each USB controller listed and select “Properties.”
- In the “Power Management” tab, uncheck the option “Allow the computer to turn off this device to save power.”
- Click “OK” to save the changes.
- Reset the BIOS settings:
- Restart the computer and repeatedly press the Esc or F10 key to enter the BIOS setup.
- Navigate to the “Advanced” or “Advanced Settings” menu.
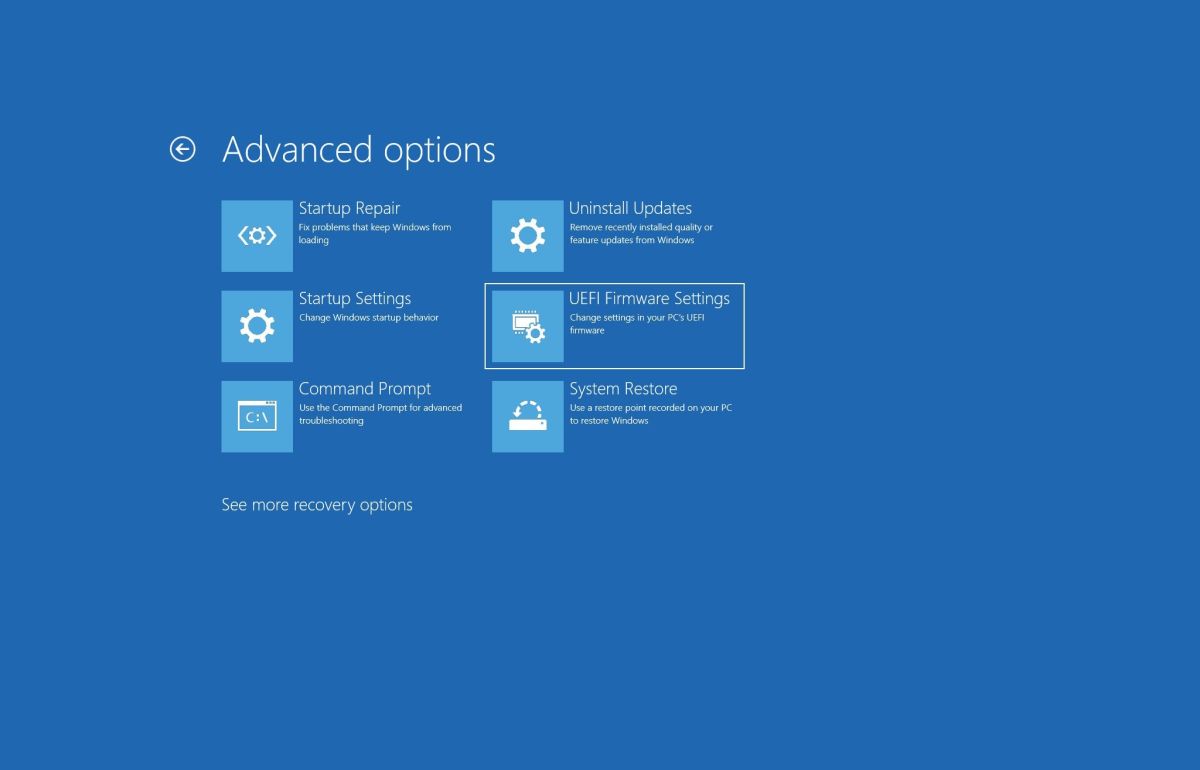
- Look for an option related to USB ports or controllers.
- Select the option to reset the BIOS settings to default or optimized defaults.
- Save the changes and exit the BIOS setup.
- Perform a system restore:
- Click on the “Start” button and type “System Restore” in the search bar.
- Select “Create a restore point” from the search results.
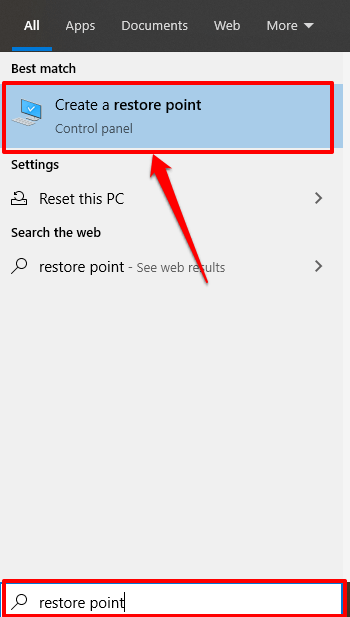
- In the System Properties window, click on the “System Restore” button.
- Follow the on-screen instructions to choose a restore point and initiate the restoration process.
- Allow the computer to restart after the system restore is complete.