Having issues with your laptop’s WiFi disconnecting? Let’s troubleshoot the problem together.
Initial Troubleshooting Steps
1. Check if the Wi-Fi is enabled on your laptop by looking for the Wi-Fi icon in the taskbar. If it’s not enabled, right-click on the icon and select Enable Wi-Fi from the context menu.
2. Make sure the wireless router is turned on and working properly. Check the lights on the router to see if it’s receiving the internet signal and transmitting it to your laptop.
3. Restart your laptop and the wireless router. Sometimes a simple restart can resolve connection issues.
4. Check if other devices are able to connect to the wireless network. If they can’t, the problem might be with the router or the internet service provider.
5. Check for any physical obstructions or interference that might be affecting the Wi-Fi signal. Move the laptop closer to the wireless router to see if the connection improves.
6. Update the device driver for the wireless network adapter on your laptop. Go to the manufacturer’s website and download the latest driver for your specific model.
7. Check if the laptop is set to automatically connect to other wireless networks. This can cause it to disconnect from your home network. Go to the Network & Internet settings in Windows and disable this feature.
8. Check the power settings on your laptop to ensure that the Wi-Fi adapter isn’t being turned off to save power. Go to the Device Manager and open the properties of the wireless network adapter to adjust the power settings.
9. Reset the network settings on your laptop by going to the Network & Internet settings and selecting Network reset to clear out any network configuration issues.
10. If none of the above steps work, try connecting your laptop to the wireless network using an Ethernet cable. If the connection stays stable, the issue might be with the Wi-Fi adapter or the wireless network itself.
Restarting Your Laptop and Network Devices
If you are experiencing WiFi disconnecting issues with your laptop, one of the first troubleshooting steps you can take is to restart your laptop and network devices. Sometimes a simple reboot can resolve connectivity issues and get your WiFi back up and running.
To restart your laptop, click on the Start button in the bottom left corner of your screen, then select the Power option and choose Restart from the menu. Allow your laptop to fully shut down and then restart it to see if this resolves the WiFi disconnecting problem.
In addition to restarting your laptop, you can also restart your network devices such as your modem, router, and wireless access point. To do this, simply unplug the power cables from each of these devices, wait for about 30 seconds, and then plug them back in. After they have fully restarted, check to see if your WiFi connection is stable.
If you are still experiencing WiFi disconnecting issues after restarting your laptop and network devices, there may be other factors at play. However, restarting your devices is a quick and easy troubleshooting step that can often resolve connectivity problems.
Disabling Network Adapter Power Saving Settings
To troubleshoot laptop WiFi disconnecting issues, you may need to disable the network adapter power saving settings. This can help prevent the adapter from turning off to save power, which may be causing the disconnection problem.
To disable the network adapter power saving settings in Windows, first, go to the “Control Panel” and then select “Network and Sharing Center.”
Next, click on “Change adapter settings” in the left-hand menu. This will show you a list of network connections on your computer.
Find your WiFi network adapter, right-click on it, and select “Properties” from the context menu.
In the properties window, click on the “Configure” button. This will open the properties for your network adapter.
Look for the “Power Management” tab and click on it. Here, you will see an option that says “Allow the computer to turn off this device to save power.” Uncheck this option to disable the power saving settings for your network adapter.
Click “OK” to save the changes, and then close the properties window.
After disabling the network adapter power saving settings, restart your computer and see if the WiFi disconnecting issue has been resolved.
Updating Network Adapter Drivers
To troubleshoot laptop WiFi disconnecting issues, updating the network adapter drivers can often resolve the problem. First, identify the network adapter model in your laptop. You can do this by right-clicking on the Start button, selecting Device Manager, and then expanding the Network adapters category. Look for the specific network adapter that is causing the issue.
Once you have identified the network adapter model, visit the manufacturer’s website to download the latest driver for the adapter. Be sure to download the driver that is compatible with your operating system, whether it is Microsoft Windows, macOS, or Linux.
After downloading the driver, install it by following the manufacturer’s instructions. This may involve running a setup file or using a driver installation wizard. Once the installation is complete, restart your laptop to ensure that the new driver is fully integrated into the system.
It’s also a good idea to check for updates using the built-in Windows Update feature, as this can sometimes provide driver updates for your network adapter. To do this, go to Settings > Update & Security > Windows Update and click on Check for updates.
If updating the network adapter drivers does not resolve the WiFi disconnecting issues, you may need to consider other factors such as the proximity to the wireless access point, interference from other devices, or potential issues with the modem or router. However, in many cases, updating the drivers can significantly improve WiFi stability and connectivity.
Changing Wireless Scan Valid Interval
To change the wireless scan valid interval on your laptop, follow these steps. First, click on the Wi-Fi icon in the taskbar to open the network settings. Then, select the network you are currently connected to and click on “Properties.”
Next, navigate to the “Advanced” tab and look for the option that says “Wireless Mode” or “Wireless Adapter Settings.” Once you locate it, click on it to expand the settings.
Look for an option that allows you to change the wireless scan valid interval. This setting may be listed as “Scan Valid Interval,” “Scan Interval,” or something similar. Once you find it, click on it to select it.
Modify the scan valid interval to a value that is suitable for your network environment. The default value is often set to 60 seconds, but you can try adjusting it to 120 or 180 seconds to see if it improves the stability of your Wi-Fi connection.
Once you have made the necessary changes, click “OK” or “Apply” to save the settings. Then, close the network properties window and test your Wi-Fi connection to see if the issue has been resolved.
Changing the wireless scan valid interval can help troubleshoot laptop Wi-Fi disconnecting issues by allowing the wireless adapter to scan for networks less frequently, which can reduce the likelihood of disconnections.
If you continue to experience problems with your Wi-Fi connection, you may need to explore other troubleshooting steps, such as updating your device drivers, adjusting your power management settings, or relocating your router to improve signal strength.
Remember to always test your Wi-Fi connection after making any changes to ensure that the issue has been resolved. If you are still unable to maintain a stable connection, you may need to contact your internet service provider or seek assistance from a professional technician.
By adjusting the wireless scan valid interval, you can potentially improve the stability of your Wi-Fi connection and reduce the frequency of disconnections on your laptop. Keep in mind that the optimal scan interval may vary depending on your specific network environment, so you may need to experiment with different values to find the best setting for your situation.
Repairing and Replacing Corrupted System Files
If you are experiencing issues with your laptop’s WiFi disconnecting, it may be due to corrupted system files. To troubleshoot this problem, you can try repairing or replacing the corrupted files.
One way to repair corrupted system files is by using the System File Checker tool in Windows. To do this, you will need to open a command prompt with administrative privileges. You can do this by searching for “cmd” in the Windows search bar, right-clicking on Command Prompt, and selecting “Run as administrator.”
Once the command prompt is open, you can run the System File Checker tool by typing the following command and pressing Enter:
sfc /scannow
This command will scan your system for corrupted files and attempt to repair them. It may take some time to complete, so be patient and wait for the process to finish.
If the System File Checker tool is unable to repair the corrupted files, you may need to consider replacing them. You can do this by using a Windows installation disc or USB drive to perform a repair installation of Windows. This will replace any corrupted system files with fresh copies from the installation media.
Alternatively, you can also use the Deployment Image Servicing and Management (DISM) tool to repair corrupted system files. To do this, open a command prompt with administrative privileges and type the following command:
dism /online /cleanup-image /restorehealth
This command will scan your system for corrupted files and attempt to repair them using Windows Update. Again, this process may take some time to complete.
In addition to using these tools to repair or replace corrupted system files, it’s also a good idea to run a thorough virus scan on your computer. Malware or viruses can sometimes cause system file corruption, so it’s important to rule out this possibility.
By repairing or replacing corrupted system files, you may be able to resolve the issue of your laptop’s WiFi disconnecting. If the problem persists, you may need to consider other potential causes, such as hardware issues or network configuration problems.
Running System File Checker (SFC) Scan
To troubleshoot laptop WiFi disconnecting issues, you can start by running a System File Checker (SFC) scan on your Windows laptop. This scan will help identify and fix any corrupted or missing system files that may be causing the WiFi connectivity issues.
To run a System File Checker scan:
1. Open the Command Prompt as an administrator by typing “cmd” in the Windows search bar, right-clicking on Command Prompt, and selecting “Run as administrator.”
2. In the Command Prompt window, type “sfc /scannow” and press Enter. This command will initiate the System File Checker scan, which may take some time to complete.
3. Once the scan is finished, review the results for any error messages or notifications. If the scan finds any corrupted or missing system files, it will attempt to repair or replace them automatically.
4. After the scan is complete, restart your laptop to apply any repairs made by the System File Checker.
Running a System File Checker scan can help resolve WiFi connectivity issues caused by corrupted or missing system files on your Windows laptop. If the scan does not fix the problem, you may need to explore other troubleshooting steps such as updating device drivers, resetting network settings, or checking for hardware issues.
Updating Router Firmware
To troubleshoot laptop WiFi disconnecting issues, one of the first steps you can take is to update your router firmware. Outdated firmware can cause connectivity issues and updating it may resolve the problem.
To update your router firmware, you’ll need to access the router’s settings. Open a web browser on a device that is connected to the router and enter the router’s IP address in the address bar. This will typically be something like 192.168.1.1 or 192.168.0.1.
Once you’ve entered the IP address, you will be prompted to enter your router’s username and password. If you haven’t changed these from the default, you can find them in the router’s manual or on the manufacturer’s website.
After logging in, look for the firmware update section in the router’s settings. This may be located under a tab like “Administration” or “Maintenance.” Check for any available updates and follow the on-screen instructions to download and install the latest firmware.
It’s important to note that updating the firmware can take some time and may cause a temporary interruption in your internet connection. Make sure to schedule the update at a time when you can afford to be offline for a short period.
Once the update is complete, restart your router and reconnect your laptop to the WiFi network. Test the connection to see if the issue has been resolved.
If updating the firmware doesn’t fix the problem, you may need to consider other troubleshooting steps such as checking for interference from other electronic devices, updating your device drivers, or contacting your internet service provider for further assistance.
Remember to always back up your router settings before updating the firmware in case something goes wrong during the process. This will allow you to restore your settings and configuration if necessary.
By keeping your router firmware up to date, you can help ensure a stable and reliable internet connection for all of your devices on the network.
Checking Network Adapter Power Management Options
To check the power management options for your network adapter, follow these steps:
1. First, open the Device Manager on your laptop. You can do this by pressing the Windows key + X on your keyboard and selecting “Device Manager” from the menu that appears.
2. In the Device Manager window, expand the “Network adapters” category to display the list of network adapters installed on your laptop.
3. Right-click on the network adapter that is experiencing WiFi disconnecting issues and select “Properties” from the context menu.
4. In the Properties window, navigate to the “Power Management” tab.
5. Here, you will see options related to power management for the network adapter. Make sure that the option that allows the computer to turn off this device to save power is unchecked.
6. Additionally, you can also uncheck the option that allows the computer to turn off this device to save power.
7. Click “OK” to save the changes and then close the Device Manager window.
By adjusting the power management options for your network adapter, you may be able to resolve WiFi disconnecting issues on your laptop.
Additional Troubleshooting Techniques
- Update WiFi drivers
- Open Device Manager by pressing Windows key + X and selecting Device Manager
- Expand the Network adapters section
- Right-click on your WiFi adapter and select Update driver
- Choose to search automatically for updated driver software
- Reset network settings
- Open Command Prompt as an administrator by searching for cmd in the start menu, right-clicking on Command Prompt, and selecting Run as administrator
- Type the following commands and press Enter after each one: netsh winsock reset, netsh int ip reset, ipconfig /release, ipconfig /renew
- Restart your laptop
- Adjust power settings
- Open Control Panel by searching for it in the start menu
- Click on Power Options
- Select Change plan settings for your current power plan
- Choose Change advanced power settings
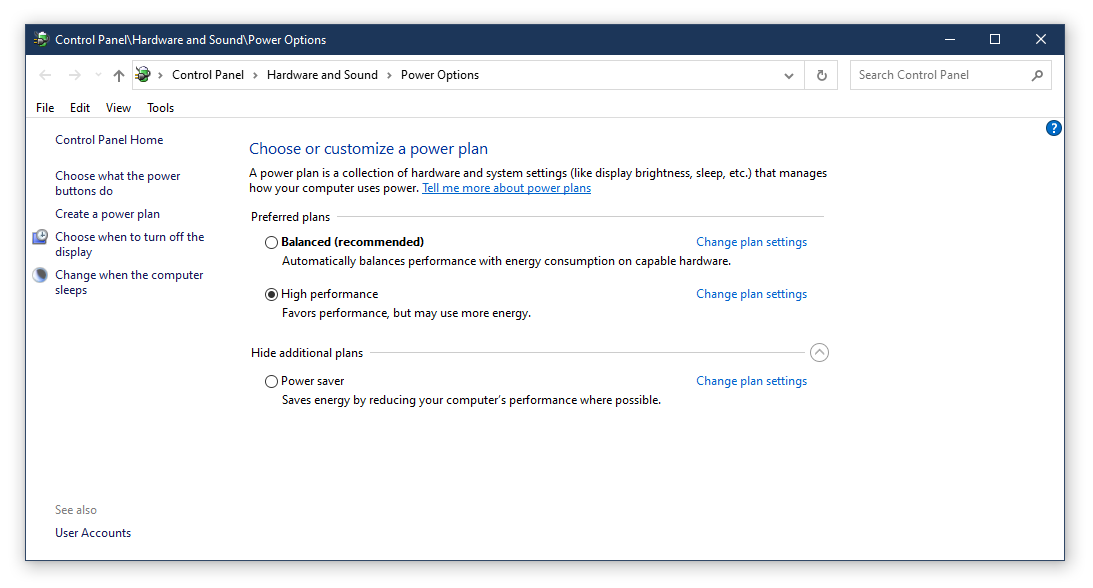
- Expand the Wireless Adapter Settings and set both On battery and Plugged in options to Maximum Performance
Exploring Further Solutions

When troubleshooting laptop WiFi disconnecting issues, it’s important to explore further solutions if the basic fixes haven’t worked. One potential solution is to update the device driver for the WiFi adapter. Outdated drivers can cause connectivity issues, so it’s important to ensure that the driver is up to date.
Another possible solution is to check for interference from other devices on the same ISM radio band. Other electronic devices operating on the same frequency can cause WiFi interference, so try moving the laptop and router to a different location to see if the connection improves.
If you’re using Microsoft Windows, it’s worth checking the power settings for the WiFi adapter. Sometimes, power-saving settings can cause the adapter to disconnect, so adjusting the power settings may help stabilize the connection.
It’s also important to check for any software or settings that may be causing the issue. Sometimes, third-party software or changes to network settings can disrupt the WiFi connection. Review any recent changes to the system and revert them if necessary.
If you have access to a network switch or router, try connecting the laptop directly to the router via an Ethernet cable. This can help determine if the issue is specific to the WiFi connection or if it’s a broader network issue.
In some cases, a network interface controller reset can help resolve WiFi connectivity problems. To do this, open the command prompt and type “ipconfig /release” followed by “ipconfig /renew” to reset the network interface controller.
If you suspect that the issue may be related to the router or modem, try restarting the devices or performing a factory reset. This can help clear any temporary issues that may be causing the WiFi disconnects.
Additionally, it’s a good idea to backup any important files on the laptop before attempting any major troubleshooting steps. This ensures that you don’t lose any important data in the event that something goes wrong during the troubleshooting process.
When exploring further solutions for laptop WiFi disconnecting issues, it’s important to be methodical and patient. Testing different solutions one at a time can help identify the root cause of the problem and lead to a more stable WiFi connection.
Utilizing Third-Party Repair Tools

One popular third-party repair tool for WiFi connectivity issues is [NetSpot](https://www.netspotapp.com/). This tool allows you to visualize, manage, troubleshoot, and audit your wireless network. It can help identify any dead zones or interference that may be causing the disconnects and provide recommendations for improving your WiFi connection.
Another useful tool is [inSSIDer](https://www.metageek.com/products/inssider/), which can be used to analyze the WiFi environment and identify potential sources of interference. This tool is especially useful for troubleshooting disconnect issues related to signal interference or overlapping channels.
For more advanced users, [Wireshark](https://www.wireshark.org/) is a powerful network protocol analyzer that can be used to capture and interactively browse the traffic running on a computer network. This tool can help identify any abnormal network traffic that may be causing the WiFi disconnects and assist in finding a solution.
When using third-party repair tools for troubleshooting laptop WiFi issues, it’s important to ensure that they are reputable and safe to use. Be cautious when downloading and installing any third-party software, and always verify the source to avoid potential security risks.
In addition to using third-party repair tools, it’s also important to consider other factors that may be contributing to the WiFi disconnect issues. [Checking for software or driver updates](https://support.microsoft.com/en-us/windows/update-drivers-in-windows-10-ec62f46c-ff14-c91d-d712-67d3d89ba0cf) for your laptop’s wireless network adapter can often resolve connectivity problems.
Additionally, [restarting your router](https://www.lifewire.com/how-to-properly-restart-a-router-modem-2624570) and modem, and ensuring that they are placed in an optimal location for signal strength, can also help improve WiFi connectivity.
If the issue persists, [resetting your network settings](https://www.howtogeek.com/265870/how-to-reset-your-entire-network-in-windows-10-and-start-from-scratch/) on your laptop can often resolve any underlying configuration problems that may be causing the disconnects.
Comprehensive Troubleshooting Guide
| Step | Description |
|---|---|
| 1 | Check WiFi signal strength |
| 2 | Restart the router |
| 3 | Update wireless drivers |
| 4 | Disable power saving mode |
| 5 | Reset network settings |
| 6 | Check for interference |
| 7 | Use a different WiFi channel |
| 8 | Check for software conflicts |
| 9 | Reset the laptop’s network settings |
| 10 | Consult a professional |
Final Thoughts and Conclusion
In conclusion, troubleshooting laptop WiFi disconnecting issues can be a frustrating process, but with the right approach, it can be resolved effectively.
First and foremost, it is important to ensure that the WiFi issue is not related to the internet access itself. If other devices in the same network are experiencing similar problems, the issue may be with the network or the internet service provider.
If the problem seems to be isolated to the laptop, one of the first steps to take is to check the WiFi connection settings on the computer. Make sure that the WiFi adapter is enabled and that the correct network is selected.
It is also important to update the WiFi drivers on the laptop. Outdated or corrupted drivers can cause connectivity issues, so keeping them up to date is crucial.
In some cases, restarting the router can also help resolve WiFi connectivity problems. Simply unplugging the router for a few seconds and then plugging it back in can sometimes reset the connection and resolve any issues.
If all else fails, performing a network reset on the laptop can often resolve persistent WiFi issues. This will reset all network settings on the computer, which can sometimes clear up any underlying problems.
It is also a good idea to check for interference from other electronic devices that may be disrupting the WiFi signal. Devices such as cordless phones, microwaves, and even neighboring WiFi networks can cause interference that affects the laptop’s connectivity.
In some cases, it may be necessary to move the laptop closer to the router or invest in a WiFi extender to improve the signal strength and stability.
Finally, if none of these steps resolve the issue, it may be time to seek professional assistance from a computer technician. They can diagnose the problem more thoroughly and provide a solution tailored to the specific issue at hand.