Troubleshooting iTunes Helper not running on Windows 10/11 can be a perplexing issue for many users. In this article, we delve into the common causes behind this problem and explore effective solutions to get iTunes Helper up and running smoothly once again.
Addressing iTunes Helper issues in Windows 10
If you’re experiencing issues with iTunes Helper not running on your Windows 10/11 computer, we have a few steps to help you fix it.
First, open the Task Manager by pressing Ctrl + Shift + Esc on your keyboard. Look for the iTunesHelper.exe process in the “Processes” tab. If you don’t see it, it means iTunes Helper isn’t running.
To resolve this, you can try disabling and re-enabling iTunes Helper in the startup settings. Open the Run dialog by pressing Win + R and type msconfig. In the “Startup” tab, find the iTunesHelper startup entry and make sure it’s checked. Click “Apply” and then “OK” to save the changes.
If the issue persists, you can also try updating your iTunes software and drivers. Visit the Apple website or use the iTunes update feature to ensure you have the latest version.
Hopefully, these steps will help you fix the iTunes Helper not running issue on your Windows 10/11 computer.
Information about iTunesHelper.exe file
iTunesHelper.exe is a program file associated with iTunes and is responsible for providing certain functionality to the application. If you’re experiencing issues with iTunes Helper not running on your Windows 10/11 PC, there are a few steps you can take to fix the problem.
First, make sure that iTunes is updated to the latest version. This can often resolve any compatibility issues with your operating system.
If that doesn’t work, you can try disabling iTunes Helper from starting up with your computer. To do this, open the Task Manager and go to the Startup tab. Look for iTunesHelper.exe in the list, right-click on it, and choose “Disable”.
You can also use Microsoft’s MSCONFIG tool to manage startup programs. Simply type “msconfig” in the Windows search bar, go to the “Startup” tab, and uncheck iTunes Helper.
If you’re still experiencing issues, it may be worth running a diagnostics tool like DriverFix to ensure that your PC’s drivers are up to date.
Remember to be cautious when making changes to your computer’s startup entries, and always research the impact of disabling certain programs before doing so.
Fixing iTunesHelper not running
If you’re facing an issue with iTunesHelper not running on your Windows 10/11 computer, here are some steps you can take to fix it:
1. Check if iTunesHelper is enabled in the startup entries:
a. Press the Windows key + R to open the Run dialog box.
b. Type “regedit” and hit Enter to open the Registry Editor.
c. Navigate to the following path: HKEY_CURRENT_USER\Software\Microsoft\Windows\CurrentVersion\Run.
d. Look for an entry named “iTunesHelper” and ensure its value is set to “C:\Program Files\iTunes\iTunesHelper.exe”.
2. Update iTunes and related software:
a. Open iTunes and go to Help > Check for Updates.
b. Install any available updates for iTunes and associated programs like iCloud or Apple drivers.
3. Disable conflicting security software or diagnostics tools:
a. Temporarily disable any security software or diagnostics tools that might interfere with iTunesHelper.
b. Restart your computer and check if iTunesHelper is now running properly.
By following these steps, you should be able to resolve the issue of iTunesHelper not running on your Windows 10/11 computer.
python

import subprocess
def ituneshelper(command):
# Execute the iTunes Helper command using subprocess
process = subprocess.Popen(["/path/to/ituneshelper", command], stdout=subprocess.PIPE, stderr=subprocess.PIPE)
output, error = process.communicate()
# Check if there was an error during execution
if error:
print(f"An error occurred: {error.decode()}")
else:
print(f"Command executed successfully: {output.decode()}")
# Example usage
ituneshelper("play") # Execute the "play" command
ituneshelper("next") # Execute the "next" command
Please note that the above code assumes you have the ituneshelper command-line tool installed on your system and provides a basic structure for executing commands. You would need to replace “/path/to/ituneshelper” with the actual path to the ituneshelper executable on your system.
Keep in mind that this is a basic example, and the actual implementation may vary depending on the specific functionality and requirements you have for your tool.
Additional solutions for fixing iTunesHelper not running
- Restart your computer: Sometimes, a simple restart can resolve issues with iTunesHelper not running.
- Check for updates: Ensure that both your Windows operating system and iTunes software are up to date. Install any pending updates and try running iTunesHelper again.
- Reinstall iTunes: Uninstall iTunes from your computer and then download and install the latest version from the official Apple website. This can help fix any corrupted or missing files that may be causing iTunesHelper not to run.
- Run iTunes as an administrator: Right-click on the iTunes shortcut and choose “Run as administrator” to give iTunes the necessary permissions it needs to run properly.
- Disable conflicting software: Temporarily disable any antivirus or security software, as they may interfere with iTunesHelper. Remember to enable them again once you have resolved the issue.
- Check startup programs: Open the Task Manager and go to the Startup tab. Make sure the iTunesHelper entry is enabled. If it’s disabled, right-click on it and choose “Enable” to ensure it runs when your computer starts.
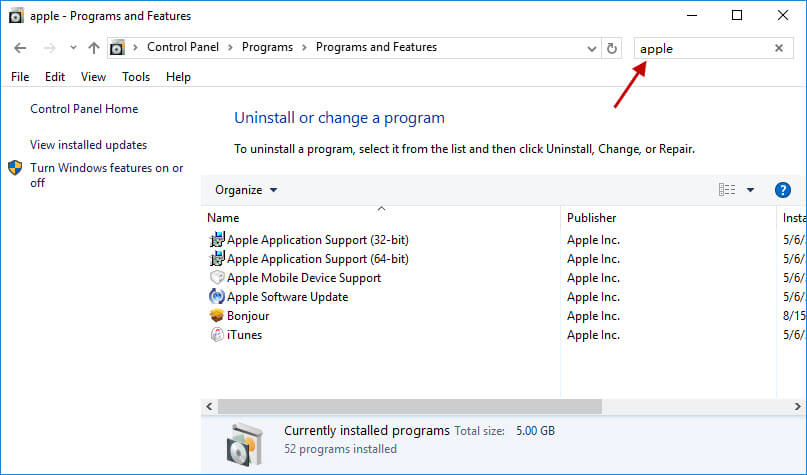
- Repair iTunes installation: Open the Control Panel, go to “Programs” or “Programs and Features,” and locate iTunes in the list of installed programs. Click on it and select “Repair” to fix any issues with the installation.
- Reset the iTunes preferences: Press the Windows key + R, type “%appdata%\Apple Computer\iTunes” (without quotes), and press Enter. Locate the iTunesPrefs.xml file, and either delete it or rename it to something like “iTunesPrefs_old.xml”. Restart iTunes, and it will recreate the preferences file.

- Check for third-party software conflicts: Some third-party software, such as virtual audio drivers or system optimization tools, can interfere with iTunesHelper. Disable or uninstall any such software temporarily to see if it resolves the issue.
- Seek Apple Support: If none of the above solutions work, it’s recommended to reach out to Apple Support for further assistance in troubleshooting and resolving the iTunesHelper not running problem.
