Unveiling the perplexing conundrum of accessing the Google Chrome App Launcher
Troubleshooting the App Launcher
If you’re having trouble accessing the Google Chrome App Launcher, we have some steps to help you fix the issue.
First, make sure you’re signed in to your Google account. If you’re not, sign in and try again.
If the app button is missing from the navigation sidebar, try clearing your cache and cookies. To do this, click on the three dots in the top right corner, go to “More tools,” and select “Clear browsing data.” Make sure to choose “Cached images and files” and “Cookies and other site data,” then click “Clear data.”
If the App Launcher is still not working, try disabling any extensions or add-ons that could be causing the problem. To do this, click on the three dots in the top right corner, go to “More tools,” and select “Extensions.” Disable any extensions you don’t need or suspect could be causing the issue.
Lastly, if none of these steps resolve the issue, try resetting your Chrome settings. This will revert Chrome back to its default state. To do this, type “chrome://settings/reset” into the address bar, then click “Reset settings.”
These troubleshooting steps should help you regain access to the Google Chrome App Launcher. If you continue to experience issues, please visit our support forum for further assistance.
Optimizing Chromebook for App Launcher
If you’re having trouble accessing the Google Chrome App Launcher on your Chromebook, here are a few steps you can try:
1. Check your account: Make sure you’re signed in to your Google account on your Chromebook.
2. Restart the app launcher: Sometimes, a simple restart can fix the issue. To do this, press the search key on your keyboard or click on the app button in the navigation sidebar, then click on the power button and select “Restart”.
3. Clear cache and data: Clearing the cache and data of the App Launcher can help resolve any issues. Press Ctrl + Shift + Delete to open the Clear browsing data window. Make sure “Cached images and files” and “Cookies and other site data” are selected, then click “Clear data”.
4. Update Chrome OS: Keeping your Chromebook’s operating system up to date can help fix bugs and improve performance. Go to Settings, click on “About Chrome OS”, and select “Check for updates”.
If none of these steps work, you may want to try using a different browser or reach out to the Chromebook support forum for further assistance.
Resolving Connectivity Issues
If you’re experiencing trouble accessing the Google Chrome App Launcher, here are a few steps you can take to resolve the issue:
1. Check your internet connection: Ensure that you have a stable internet connection. If you’re using Wi-Fi, try connecting to a different network or restarting your router.
2. Clear cache and cookies: Sometimes, accumulated cache and cookies can interfere with the app launcher’s functionality. To clear them, press Ctrl+Shift+Delete and select the appropriate options.
3. Update Chrome: Make sure you’re using the latest version of Google Chrome. Click on the three-dot menu in the top-right corner, select “Help,” and then click on “About Google Chrome” to check for updates.
4. Disable extensions: Extensions can sometimes cause conflicts with the app launcher. Go to the three-dot menu, select “More Tools,” and then click on “Extensions.” Disable any extensions that may be causing the issue.
5. Reset Chrome settings: If the problem persists, you can reset Chrome settings to their default state. Type chrome://settings/reset in the address bar, click “Reset settings,” and confirm the action.
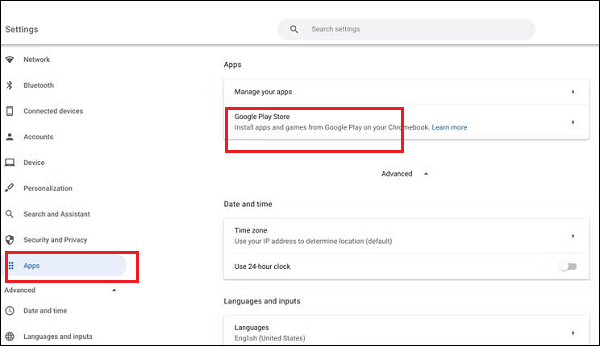
Managing and Updating Android Apps on Chromebook
- Introduction: Learn how to manage and update your Android apps on a Chromebook
- Check for updates: Keep your apps up to date by regularly checking for updates in the Google Play Store
- Automatic updates: Enable automatic updates to ensure your apps are always running on the latest version
- App settings: Customize your app experience by accessing and modifying app settings
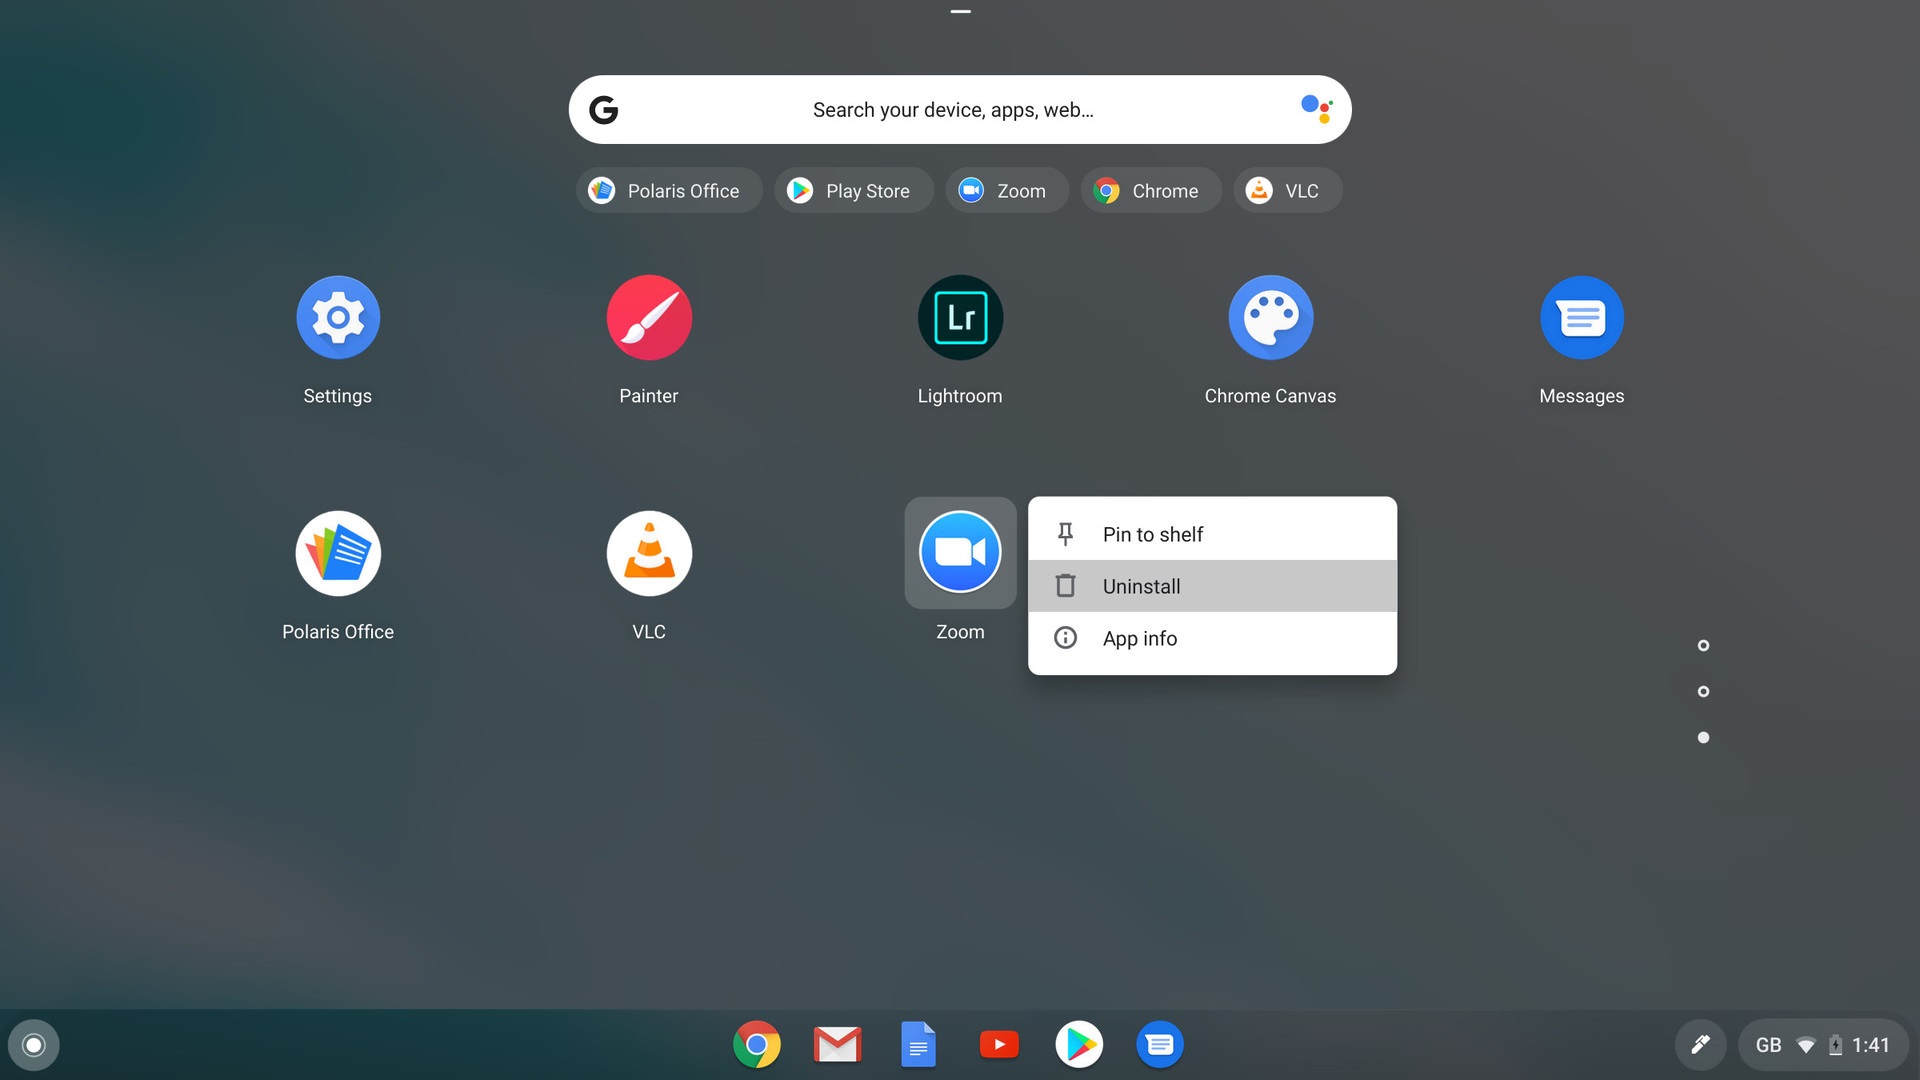
- Uninstalling apps: Easily remove unwanted apps from your Chromebook to free up storage space
- Managing storage: Monitor and manage your app storage to optimize performance and prevent any storage issues
- App permissions: Review and control the permissions your apps have to ensure your privacy and security
- Data management: Keep track of your app’s data usage and manage it to avoid exceeding your data limit
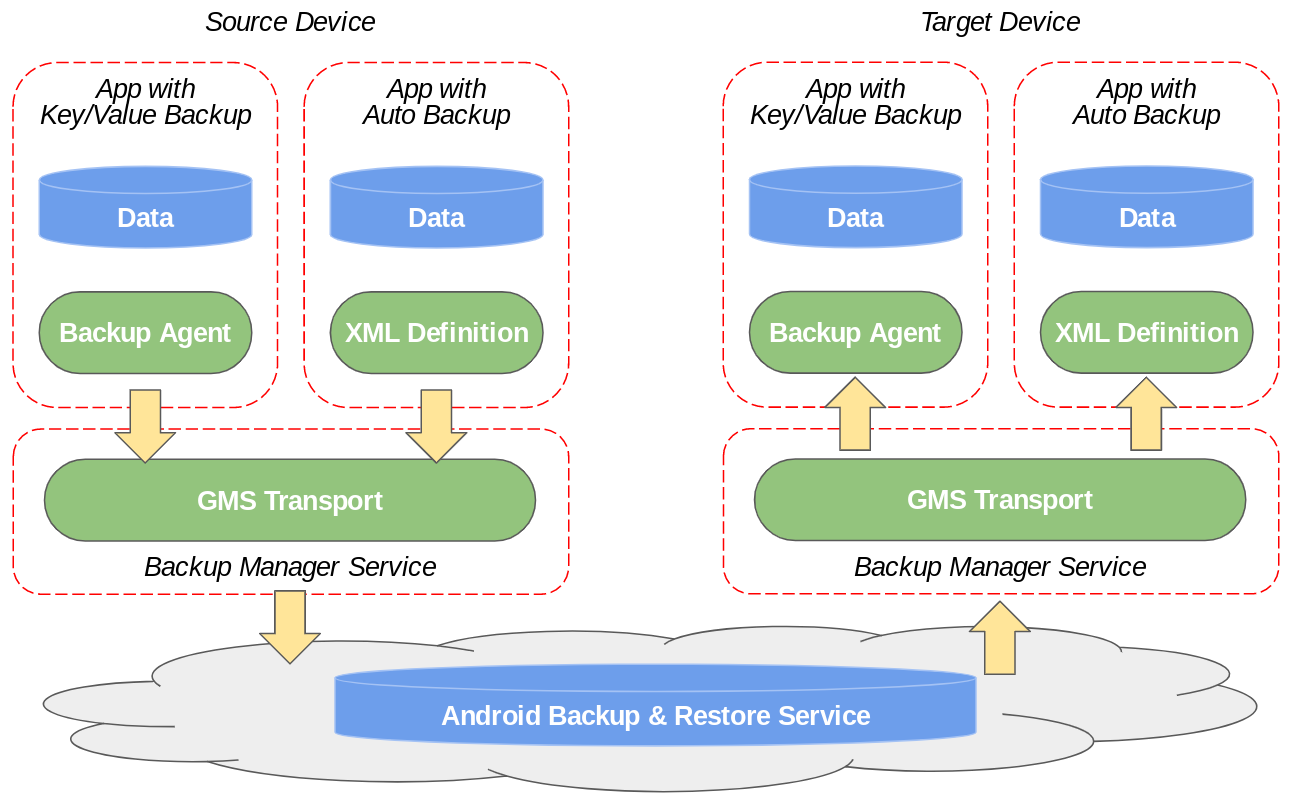
- Backup and restore: Safeguard your app data by backing it up and easily restore it if needed
- Troubleshooting: Resolve common app issues by following troubleshooting steps and tips