Welcome to the ultimate guide on resolving sound woes encountered by MacBook Pro users. Whether you’re struggling with muted audio or distorted sound, this article strives to provide effective solutions to help you reclaim the harmonious symphony of your device.
Troubleshooting Sound Issues on MacBook Pro
If you’re experiencing sound issues on your MacBook Pro, there are a few troubleshooting steps you can take to resolve the problem.
First, check your sound settings by clicking on the Apple menu and selecting “System Preferences.” Then, click on the “Sound” icon and navigate to the “Output” tab. Make sure the correct audio device is selected and adjust the volume slider accordingly.
If you’re using external speakers or headphones, ensure they are properly connected to the appropriate audio ports.
To test the sound, play a video or audio file and adjust the volume using the keyboard or the volume buttons on the Mac.
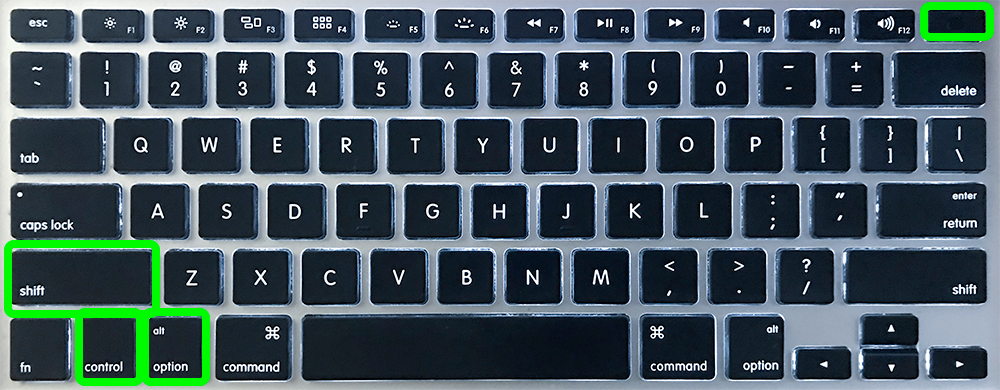
If you’re still experiencing issues, try restarting your MacBook Pro. If that doesn’t work, consider resetting the NVRAM by shutting down your Mac, then powering it back on and immediately pressing and holding the Command, Option, P, and R keys until you hear the startup sound twice.
For additional assistance, you can visit the Apple Support website for a variety of fixes and explanations.
Checking Sound Settings and Output Sources
To check your sound settings and output sources on your MacBook Pro, follow these steps:
1. Click on the Apple menu at the top left of your screen and select “System Preferences.”
2. In the System Preferences window, click on the “Sound” icon.
3. In the Sound settings, click on the “Output” tab.
4. Here, you will see a variety of output devices, such as speakers, headphones, or external audio ports.
5. To select an output device, simply click on it in the list.
6. Adjust the volume for your selected output device by dragging the volume slider or using the volume buttons on your keyboard.
7. If the volume is muted, make sure the “Mute” checkbox is not selected.
8. If you are experiencing sound issues, you can also try resetting the NVRAM on your MacBook Pro.
9. Once you have made your changes, test the sound by playing a video or audio file.
If you are still experiencing issues, it may be helpful to consult Apple Support for further assistance.
Running Maintenance Scripts and Restarting Mac
To fix sound issues on your MacBook Pro, running maintenance scripts and restarting your Mac can be helpful. Here’s how you can do it:
1. Running Maintenance Scripts:
– Open the Terminal application by searching for it in Spotlight or navigating to Applications > Utilities > Terminal.
– In the Terminal window, type “sudo periodic daily weekly monthly” and press Enter.
– Enter your administrator password when prompted.
– Wait for the scripts to run, which may take a few minutes.
– Restart your Mac after the scripts have completed.
2. Restarting your Mac:
– Click on the Apple menu in the top left corner of your screen.
– Select “Restart” from the dropdown menu.
– Wait for your Mac to shut down and turn back on.
– Check if the sound issue has been resolved.
By performing these maintenance tasks, you can often fix sound-related issues on your MacBook Pro. If the problem persists, you may need to explore other troubleshooting methods or seek further assistance.
applescript

-- Toggle Sound Mute/Unmute on MacBook Pro
-- Check if sound is currently muted
tell application "System Events"
set isMuted to output muted of (get volume settings)
end tell
-- Toggle the sound mute state
tell application "System Events"
if isMuted then
set volume with output muted
display notification "Sound has been muted."
else
set volume without output muted
display notification "Sound has been unmuted."
end if
end tell
To execute this script, you can either use the macOS built-in “Script Editor” or save the code as an AppleScript file (.scpt) and run it with the AppleScript Editor. When executed, the script will check the current sound mute state and toggle it accordingly, displaying a notification to indicate whether the sound has been muted or unmuted.
Updating macOS and Resetting NVRAM/SMC
To fix sound issues on your MacBook Pro, you can try updating macOS and resetting NVRAM/SMC.
To update macOS, follow these steps:
1. Click on the Apple menu in the top left corner of your screen.
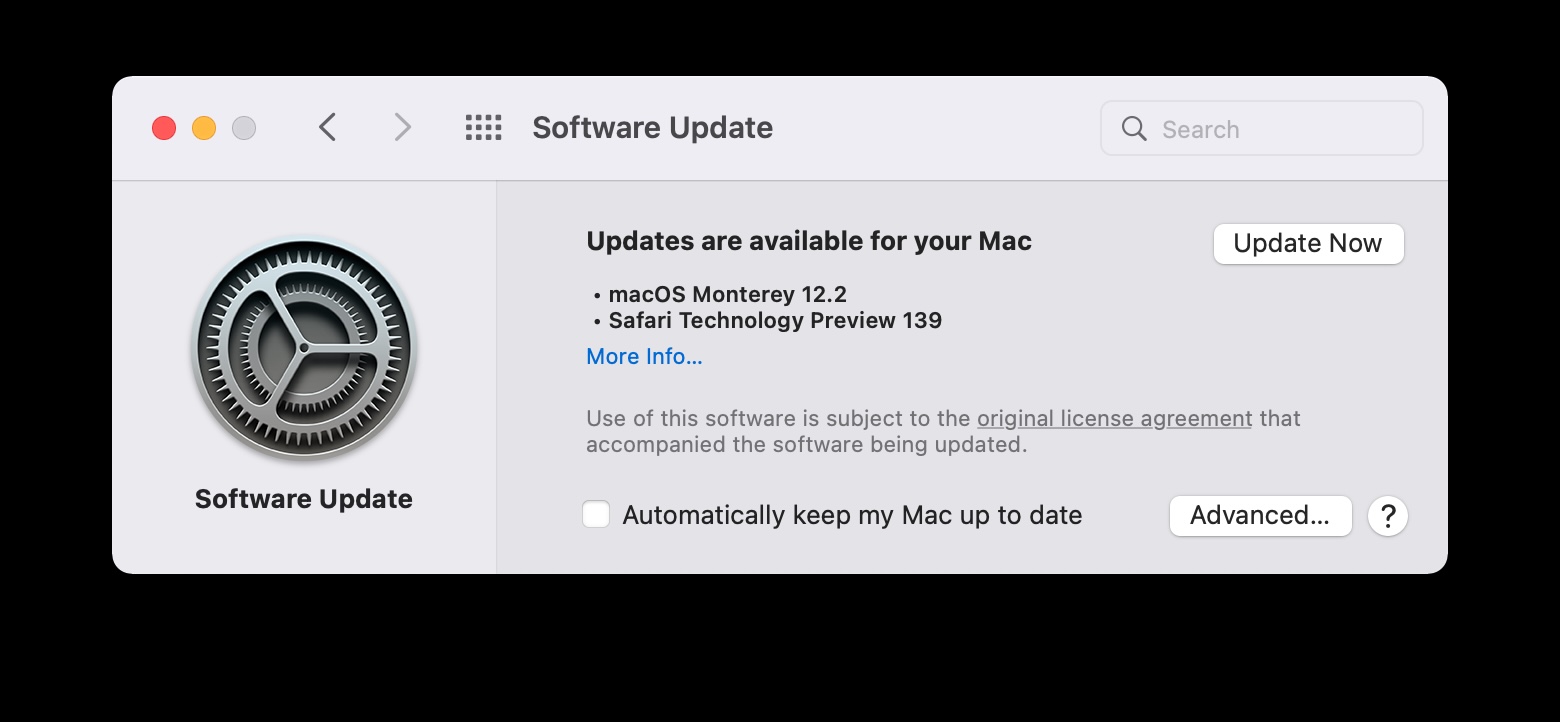
2. Select “System Preferences” and then click on “Software Update”.
3. If there is an update available, click on “Update Now” to install it.
To reset NVRAM/SMC, follow these steps:
1. Shut down your MacBook Pro.
2. Press and hold the power button for 10 seconds, then release it.
3. Press and hold the Command (⌘), Option, P, and R keys together.
4. Keep holding the keys until you hear the startup sound for the second time, then release them.
By updating macOS and resetting NVRAM/SMC, you can often resolve sound issues on your MacBook Pro. If these steps don’t fix the issue, you may need to contact Apple support for further assistance.
Fixing Sound Issues with Peripherals and Troublesome Apps
If you’re experiencing sound issues with peripherals and troublesome apps on your MacBook Pro, there are a few steps you can take to fix the problem.
First, check your System Settings by clicking on the Apple menu and selecting “System Preferences.” Then, click on the “Sound” icon.
In the Sound window, navigate to the “Output” tab. Here, you’ll see a list of available output devices. If your desired output device is not selected, click on it to choose it as the default.
If you’re still not getting sound, make sure the volume is turned up on both your MacBook Pro and the external device. Use the volume control keys on your keyboard or the volume slider in the Touch Bar (for MacBook Pro models with a Touch Bar).
If you’re using headphones or a headset, check the headphone jack for any debris or damage. Adjust the volume using the volume control buttons on your headphones or headset.
Ensuring Proper Connection of Headphones or Speakers
To ensure proper connection of headphones or speakers on your MacBook Pro, follow these steps:
1. Check the physical connection: Make sure your headphones or speakers are securely plugged into the headphone jack or the appropriate port on your Mac.
2. Verify the audio output settings: Click on the Apple menu and select “System Preferences.” Then, click on “Sound” and go to the “Output” tab.
3. Select the correct output device: In the Output tab, choose the appropriate audio device from the list. If you’re using headphones, select “Headphones” or the specific headphone model. For speakers, select the corresponding option.
4. Adjust the volume: Use the volume slider in the Output window or the volume keys on your keyboard to adjust the sound level.
5. Test the connection: Play some audio or a video to check if the sound is coming through the headphones or speakers.
Frequently Asked Questions about Sound Problems on MacBook Pro
- Shut down your MacBook Pro.
- Press the power button to turn it on, then immediately press and hold Command + Option + P + R keys.
- Continue holding the keys until you hear the startup sound for the second time.
- Release the keys and let your MacBook Pro boot up normally.
Check Sound Settings
- Click on the Apple menu and select System Preferences.
- Click on Sound and navigate to the Output tab.
- Ensure that the correct output device is selected and the volume slider is not muted or set too low.
Update macOS
- Click on the Apple menu and select System Preferences.
- Click on Software Update and check for any available updates.
- If updates are available, click on Update Now and follow the on-screen instructions to install them.
- Restart your MacBook Pro after the updates are installed.
Check for Audio Software Conflicts
- Open the Applications folder and navigate to the Utilities folder.
- Open Audio MIDI Setup and select the Audio Devices tab.
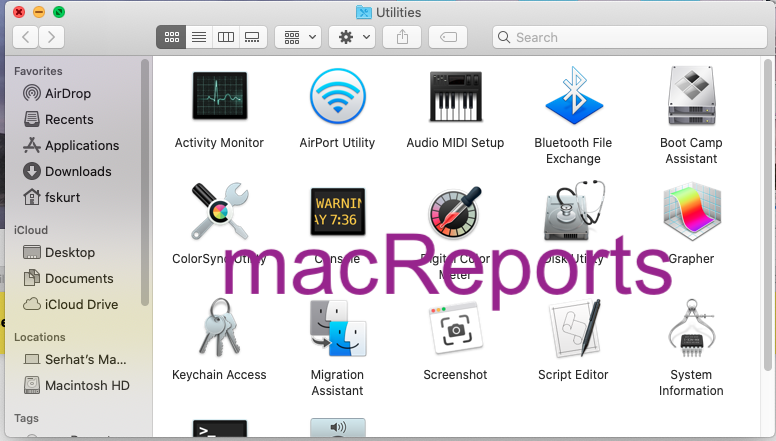
- Check for any third-party audio software or plugins that may be causing conflicts.
- If found, try disabling or removing them, and then restart your MacBook Pro.
Reset Core Audio
- Open Terminal from the Utilities folder in the Applications folder.
- Type the command sudo killall coreaudiod and press Enter.

- Enter your administrator password when prompted and press Enter.
- Restart your MacBook Pro.