Are you frustrated with Windows 7 constantly restarting on its own? Let’s explore how to fix this annoying issue.
Adjusting System Settings to Prevent Unwanted Reboots
To prevent unwanted reboots in Windows 7, you can adjust the system settings to disable automatic restarts after system failure. First, access the Control Panel by clicking on the Start button and selecting Control Panel from the menu. In the Control Panel, click on “System and Security” and then “System.” On the left-hand side, click on “Advanced system settings.” In the System Properties window, under the “Advanced” tab, click on “Settings” under the “Startup and Recovery” section.
Check the box next to “Automatically restart” under the “System failure” section to disable automatic restarts. Click “OK” to apply the changes and exit the System Properties window. This will prevent Windows 7 from automatically rebooting after a system failure, allowing you to see any error messages and troubleshoot the issue without the system restarting unexpectedly.
It’s important to note that disabling automatic restarts may not fix the underlying issue causing the system failure. Be sure to address any software or hardware problems that may be causing the unwanted reboots. Additionally, consider updating device drivers, running antivirus and malware scans, and checking for Windows updates to ensure the stability and security of your system.
Diagnosing and Resolving RAM and Overheating Issues
To diagnose and resolve RAM and overheating issues causing Windows 7 to auto restart, start by checking the RAM for any problems. Use a tool like Memtest86 to run a thorough test and identify any faulty RAM modules. If any issues are found, replace the faulty RAM to resolve the problem.
Overheating can also cause auto-restarting issues. Check the cooling system and ensure that all fans are working properly. Clean out any dust or debris that may be obstructing the airflow. Consider reapplying thermal paste to the CPU to improve heat transfer.
Additionally, make sure that the power supply unit is functioning correctly. A faulty PSU can cause system instability and auto-restarting. Consider testing the PSU or replacing it if necessary.
It’s also important to check for any malware or viruses that may be causing the auto-restart issue. Run a full system scan with antivirus software to detect and remove any malicious programs.
Finally, ensure that all drivers and Windows updates are installed and up to date. Use the Device Manager to check for any outdated or malfunctioning drivers and update them accordingly. Additionally, run Windows Update to install any pending updates.
By addressing these potential causes of auto-restarting, you can diagnose and resolve RAM and overheating issues in Windows 7.
Updating BIOS and Reinstalling Drivers
To fix the Windows 7 auto restarting issue, it may be necessary to update the BIOS and reinstall drivers. First, check the manufacturer’s website for instructions on updating the BIOS. Be sure to follow the instructions carefully to avoid damaging your system. After updating the BIOS, proceed to reinstall the drivers for your hardware components. This can be done through the Device Manager in the Control Panel.
Simply right-click on the device, select “Uninstall,” and then restart your computer. Windows will automatically reinstall the drivers upon reboot. If the issue persists, consider seeking further assistance from a professional.
Checking and Replacing the Power Supply
To check and replace the power supply, first, unplug the power cord from the computer and open the case. Locate the power supply unit (PSU) and disconnect all the power cables from the components inside the computer.
Next, remove the PSU from the case and replace it with a new one that has the same or higher wattage. Make sure the new PSU is compatible with your computer’s form factor.
Connect all the power cables to the components inside the computer and secure the new PSU in place. Once everything is connected, plug the power cord back in and turn on the computer to see if the auto-restarting issue is resolved.
If the issue persists, it may be related to a different hardware or software problem. It’s recommended to run a full virus scan using antivirus software and check for any recent changes to the system, such as Windows updates or new installations.
Resolving Automatic Restarts by Changing Power Options
To resolve automatic restarts on Windows 7, you can change the power options. First, go to the Control Panel and click on “Power Options”. Then, select “Change plan settings” for the current power plan. Next, choose “Change advanced power settings”. Look for “Sleep” and expand it, then expand “Allow wake timers” and change the settings to “Disable” for both “On battery” and “Plugged in” options.
After making these changes, click “Apply” and then “OK” to save the settings. This should prevent your Windows 7 system from automatically restarting. If the issue persists, you may need to further troubleshoot for other underlying causes such as system file corruption or hardware issues.
Troubleshooting with Memory and SFC Diagnostic Tools
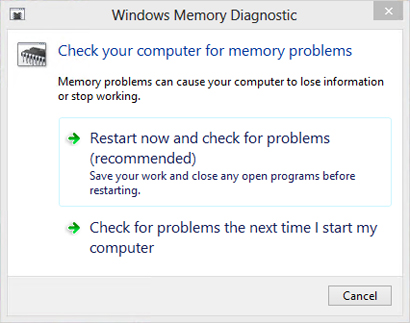
| Diagnostic Tool | Description |
|---|---|
| Windows Memory Diagnostic Tool | A tool that can help identify and resolve issues related to computer memory, such as RAM problems and memory leaks. |
| SFC (System File Checker) Tool | A built-in Windows tool that scans and repairs corrupt or missing system files, which can help resolve various system issues. |
