If you’re experiencing the frustrating “DNS Server Unavailable Error” and can’t reach a website, you’re not alone. Let’s explore some solutions to fix this issue.
Understanding DNS Server Functionality
DNS servers are essential for translating domain names into IP addresses to help locate websites on the Internet. When experiencing a “DNS Server Unavailable Error,” it means your device cannot reach the server responsible for this translation.
First, check your network connection to ensure you are properly connected to the Internet. Make sure your Wi-Fi or Ethernet connection is stable and functioning correctly.
If your network connection is stable, the issue may lie with the DNS server settings on your device. You can try changing your DNS server to a more reliable option like Google’s public DNS or OpenDNS.
To change your DNS server settings on Windows 10, go to Control Panel -> Network and Internet -> Network and Sharing Center -> Change adapter settings. Right-click on your network connection, select Properties, then double-click on Internet Protocol Version 4 (TCP/IPv4). Here you can manually input your preferred DNS server settings.
After changing your DNS server settings, try accessing the website again to see if the error has been resolved. If the issue persists, consider reaching out to technical support for further assistance in troubleshooting the problem.
Common Causes of DNS Server Issues
- Ensure that your device is connected to the internet.
- Check other devices to see if they are able to connect to the internet.
- If necessary, reset your router or modem.
Flush DNS Cache
- Open Command Prompt by searching for it in the start menu.
- Enter the command ipconfig /flushdns and press Enter.
- Wait for the process to complete and then restart your computer.
Change DNS Server
- Open Control Panel and navigate to Network and Sharing Center.
- Click on Change adapter settings.
- Right-click on your network connection and select Properties.
- Choose Internet Protocol Version 4 (TCP/IPv4) and click on Properties.
- Select “Use the following DNS server addresses” and enter a public DNS server such as Google’s (8.8.8.8 and 8.8.4.4).
Troubleshooting Network Problems
If you are encountering a DNS Server Unavailable Error and can’t reach the server, there are a few troubleshooting steps you can take to resolve the issue. First, check your internet connection to ensure it is stable and working properly.
Next, try resetting your router by unplugging it for a few minutes and then plugging it back in. This can often resolve network connectivity issues.
If the problem persists, you can try flushing your DNS cache to clear any corrupted or outdated information that may be causing the error. To do this, open the Command Prompt and type “ipconfig /flushdns”.
You can also try changing your DNS server settings to use a different server such as Google’s public DNS (8.8.8.8 and 8.8.4.4) or OpenDNS. To do this, go to your network settings and input the new DNS server addresses.
If you are still unable to reach the server, it may be helpful to restart your computer to refresh the network connection. Sometimes a simple reboot can fix the problem.
Utilizing Different Devices and Browsers
If the website loads on another device, the problem may be with your computer. Try accessing the website using a different web browser, such as Google Chrome, Firefox, or Safari. Clear the browser cache and cookies to ensure a fresh connection to the website.
If the issue persists, try restarting your router or modem. Sometimes a simple reboot can fix connectivity issues. Check your network settings in the Control Panel or System Preferences to ensure everything is configured correctly.
If the issue continues, consider disabling any antivirus software or firewall temporarily to see if they are causing the problem. Lastly, contact your internet service provider for further assistance if the problem persists.
Restarting Devices and Modems
To resolve the “DNS Server Unavailable Error: Can’t Reach Server” issue, a simple solution is restarting your devices and modems. Begin by turning off your computer, router, and modem. After a few minutes, turn them back on in the following order: modem first, then router, and finally your computer.
This process helps refresh the connection between your devices and the network, potentially resolving any DNS server issues causing the error message. Additionally, clearing your browser’s cache might help in this situation.
After restarting your devices, try accessing the website again to see if the issue has been resolved. If you continue to encounter the error, you may need to check your network settings or contact your Internet Service Provider for further assistance.
Adjusting Antivirus and Firewall Settings
To adjust your antivirus and firewall settings, you will need to access the control panel on your Windows 10 computer. Click on the Start menu and type “Control Panel” in the search bar. Open the Control Panel and navigate to the “System and Security” section.
Within the “System and Security” section, locate the options for “Windows Defender Firewall” and “Windows Defender Antivirus.” In the Windows Defender Firewall settings, you can choose to turn the firewall on or off. To adjust specific settings, click on “Allow an app or feature through Windows Defender Firewall” and make the necessary changes.
In the Windows Defender Antivirus settings, you can adjust the protection level and exclusions for certain files or folders. Click on “Virus & threat protection” and then navigate to “Virus & threat protection settings” to make adjustments.
Ensure that your antivirus and firewall settings are not blocking the DNS server or causing communication issues with the server. Make sure to save any changes you make and restart your computer to apply the new settings. If the DNS server unavailable error persists, consider seeking further technical support to troubleshoot the issue.
Managing Network Connections
To manage network connections and potentially fix the DNS server unavailable error, start by checking your Wi-Fi or Ethernet connection. Ensure that you are properly connected to your network and that your router is working correctly.
Next, clear your DNS cache to refresh your network settings. In Windows, you can do this by opening Command Prompt and typing “ipconfig /flushdns”. For Mac users, open Terminal and enter “sudo killall -HUP mDNSResponder”.
If the issue persists, try changing your DNS server settings. You can use public DNS servers like Google’s (8.8.8.8 and 8.8.4.4) or OpenDNS (208.67.222.222 and 208.67.220.220).
Additionally, consider disabling any third-party antivirus software or firewall that may be blocking your network connection. Sometimes, these programs can interfere with your internet access.
If you are still unable to reach the server, try restarting your router or modem. Sometimes, a simple reboot can resolve connectivity issues.
Modifying DNS Server Addresses
To fix the “DNS Server Unavailable Error: Can’t Reach Server” issue, you can modify the DNS server addresses on your computer. First, access the Control Panel on your Windows computer by clicking on the Start menu and selecting Control Panel.
Next, click on “Network and Sharing Center” and then choose “Change adapter settings.” Right-click on your network connection and select “Properties.”
In the Properties window, select “Internet Protocol Version 4 (TCP/IPv4)” and click on the “Properties” button. Here, you can manually set the DNS server addresses.
Enter the preferred DNS server address as 8.8.8.8 and the alternate DNS server address as 8.8.4.4. These are Google’s public DNS server addresses.
Click “OK” to save the changes and then close all windows. Finally, restart your computer to apply the new DNS server addresses.
Clearing DNS Cache
To clear your DNS cache and fix the “DNS Server Unavailable Error: Can’t Reach Server” issue, you can follow these steps. First, open the Command Prompt by searching for it in the Start menu.
ipconfig /flushdns – Enter this command in the Command Prompt window to flush the DNS resolver cache. This will clear out any outdated or corrupted information that may be causing the error.
After running the command, you should see a message indicating that the DNS resolver cache was successfully flushed.
ipconfig /registerdns – This command can also help resolve DNS issues by reregistering all DNS connections. Enter this command in the Command Prompt window and wait for the process to complete.
Once you have flushed and reregistered the DNS cache, close the Command Prompt window and restart your computer. This should help clear any DNS-related errors and allow you to reach the server without any issues.
Updating Network Adapter Drivers
![]()
| Step | Description |
|---|---|
| 1 | Open Device Manager by pressing Windows Key + X and selecting Device Manager from the menu. |
| 2 | Expand the Network adapters category to view the list of network adapters installed on your computer. |
| 3 | Right-click on the network adapter you want to update and select Update driver. |
| 4 | Choose the option to search automatically for updated driver software. |
| 5 | Follow the on-screen instructions to complete the driver update process. |
FAQs
Why is my DNS server not connecting?
Your DNS server may not be connecting due to a variety of reasons such as browser cache issues, router malfunctions, DNS server problems, or firewall interference.
How do I reset my DNS server?
To reset your DNS server, you can use the Command Prompt. Simply enter “CMD” in the Start Menu search bar, select Command Prompt, then type “ipconfig /flushdns” in the black window that appears and press ENTER. Finally, restart your computer.
Why is my DNS server this site can’t be reached?
Your DNS server may be causing the “This site can’t be reached” error. To resolve this issue, consider changing your DNS server in your operating system’s settings.
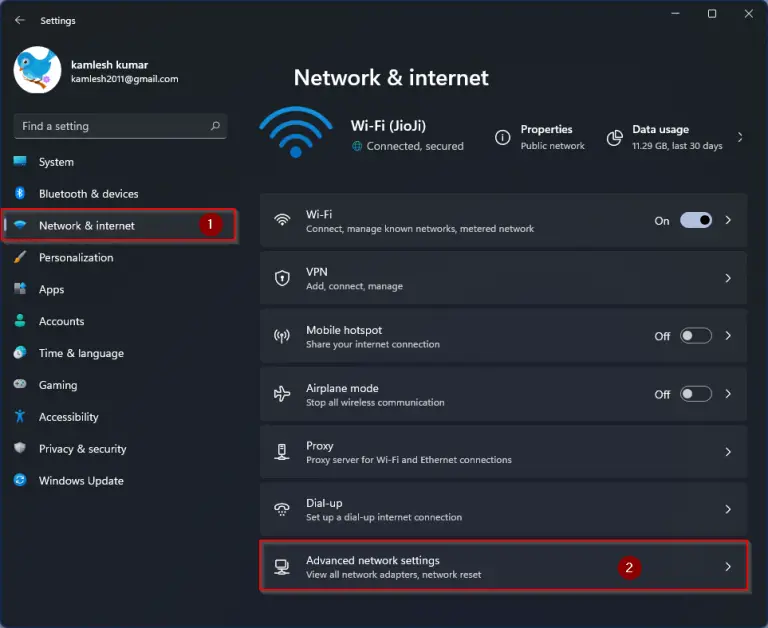
How to connect to DNS server?
To connect to a DNS server, you can open your device’s “Settings” and navigate to “Network & Internet.” From there, tap on “Wi-Fi,” hold your current network, select “Modify network,” toggle on “Advanced options,” enter the new DNS server IP addresses in the “DNS” field, and save your changes.