In this article, I will discuss how to fix the referenced memory error in Windows 10.
Optimize or Increase Virtual Memory
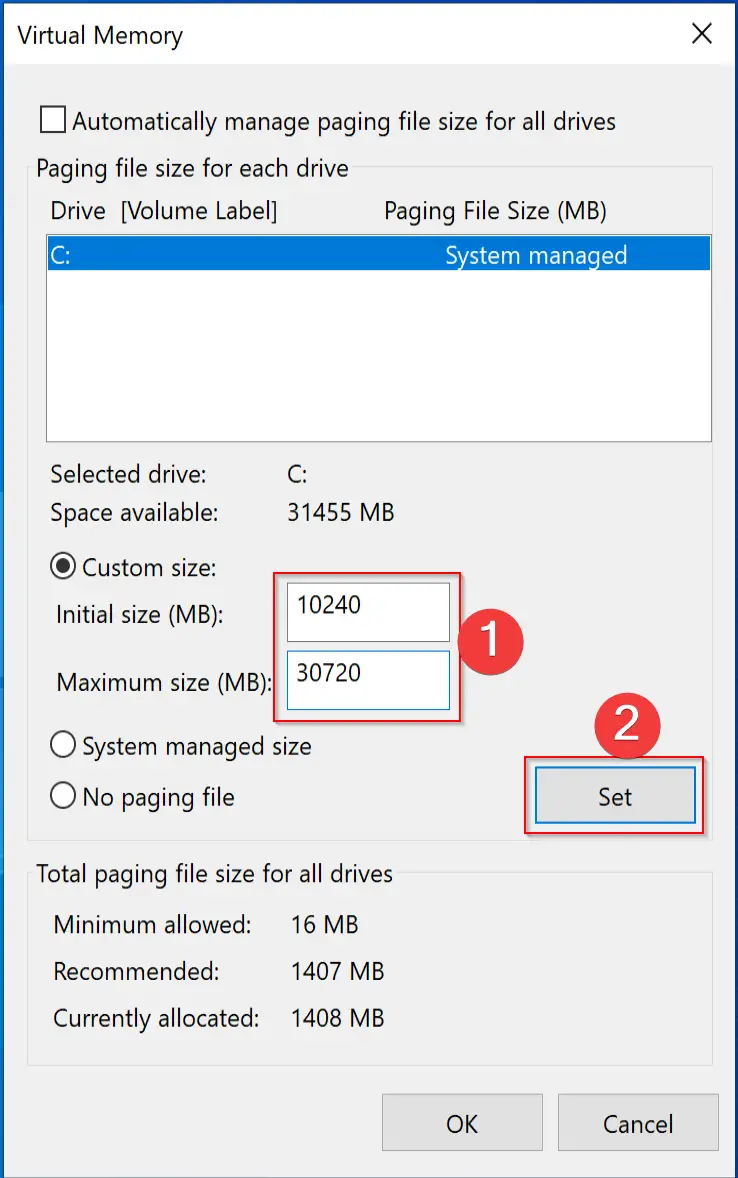
Here, go to the “Advanced” tab and click on the “Change” button under the Virtual Memory section. Uncheck the box that says “Automatically manage paging file size for all drives.” Select the drive where Windows is installed and choose the “Custom size” option. Set the Initial size and Maximum size to the recommended values (usually 1.5 times your RAM size).
Click “Set” and then “OK” to save the changes. Restart your computer for the changes to take effect. This should help optimize your virtual memory and resolve referenced memory errors in Windows 10.
Repair or Check System File Integrity
1. Press the Windows key + X on your keyboard to open the Power User menu.
2. Select “Windows PowerShell (Admin)” to open an elevated PowerShell window.
3. In the PowerShell window, type sfc /scannow and press Enter.
4. The tool will begin scanning your system files for any errors and automatically repair them if possible.
5. Once the scan is complete, restart your computer to apply the repairs.
By using the System File Checker tool, you can easily fix system file integrity issues that may be causing the referenced memory error on your Windows 10 system. This method is effective in resolving many common system file errors without the need for third-party software or extensive troubleshooting.
Update Drivers and .NET Framework
![]()
| Software | Update |
|---|---|
| Graphics Drivers | Check manufacturer’s website for latest updates |
| Network Drivers | Update through Device Manager or manufacturer’s website |
| .NET Framework | Download latest version from Microsoft website |
Conduct a Clean Boot or Close Background Applications
- Press Windows Key + R to open the Run dialog box.
- Type msconfig and press Enter to open the System Configuration window.
- Go to the Services tab and check the box next to Hide all Microsoft services.
- Click on Disable all to disable all non-Microsoft services.
- Go to the Startup tab and click on Open Task Manager.
- Disable all startup items by right-clicking on each item and selecting Disable.
- Close the Task Manager and click OK on the System Configuration window.
- Restart your computer and check if the referenced memory error is resolved.
Close Background Applications
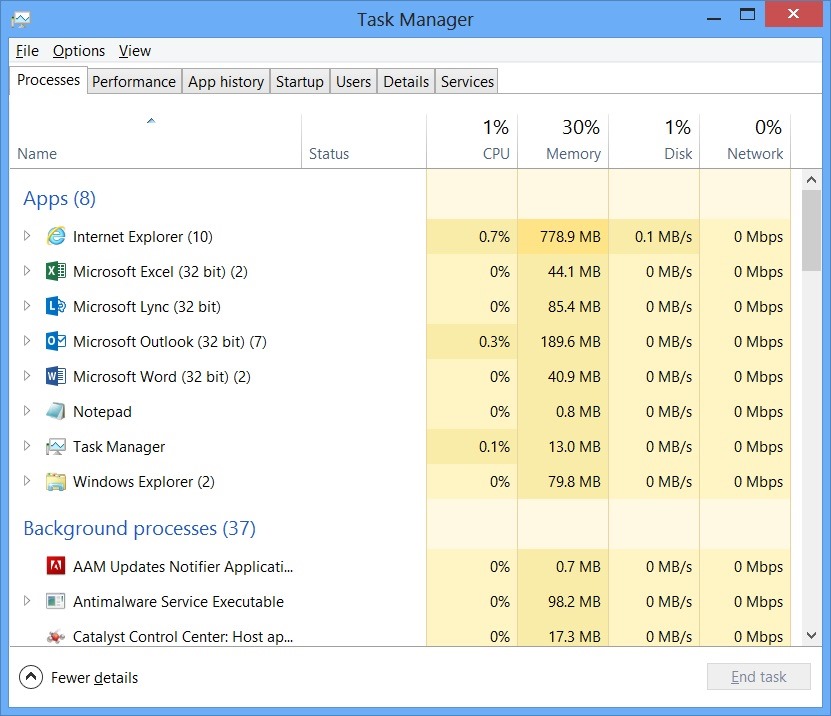
- Open Task Manager by pressing Ctrl+Shift+Esc.
- Go to the Processes tab and look for any unnecessary programs running in the background.
- Right-click on the program and select End Task to close it.
- Close any programs that you are not using to free up system resources.
- Restart your computer and check if the referenced memory error is resolved.
FAQs
How do I fix referenced memory error?
To fix a referenced memory error, you can try optimizing virtual memory, repairing corrupted system files, scanning for malware, performing a clean boot and reinstalling .Net Framework, or resetting the PC.
What does it mean when memory could not be written?
When memory could not be written, it typically indicates an attempt to write to memory pages without proper write access, possibly to pages with no access at all.
How do I fix memory error in Windows 10?
To fix memory errors in Windows 10, you can close programs using too much memory, run the Windows Troubleshooter, scan system files, increase virtual memory, upgrade RAM, update Windows, check and repair disk errors, and clean up junk and temporary files.
How to resolve the memory cannot be read error on Windows 10?
To resolve the memory cannot be read error on Windows 10, you can run the System Maintenance Troubleshooter, perform a Clean Boot, check for corruption and repair using CHKDSK, disable overclocking, and increase virtual memory.