Having trouble completing Windows 10 updates? Let’s troubleshoot the issue.
Identifying Causes of Update Failures
To identify the causes of update failures in Windows 10, follow these steps:
Check Windows Update settings: Make sure Windows Update is enabled and set to automatically download and install updates.
Run Windows Update troubleshooter: Use the built-in Windows Update troubleshooter to identify and fix any issues preventing updates from completing successfully.
Check for conflicting software: Some third-party software can interfere with Windows Update. Check for any conflicting programs and temporarily disable them to see if updates can be completed.
Check internet connection: Ensure that your internet connection is stable and strong enough to download updates.
Clear Windows Update cache: Sometimes the Windows Update cache can become corrupted, leading to update failures. Clear the Windows Update cache and try updating again.
Check for disk space: Insufficient disk space can prevent updates from being installed. Make sure your computer has enough free space to download and install updates.
Preparatory Steps Before Fixes
- Run Windows Update Troubleshooter
- Open Settings by pressing Win+I
- Click on Update & Security
- Select Troubleshoot from the left pane
- Click on Windows Update and then Run the troubleshooter
- Restart your computer
- Save any open files and close all applications
- Click on the Start button
- Click on the Power button and select Restart
- Check your internet connection
- Make sure you are connected to a stable network
- Try accessing a website to verify your internet connection
Utilizing Windows Troubleshooter and Startup Repair
1. Utilizing Windows Troubleshooter:
If you are encountering issues with completing Windows 10 updates, one of the first steps you can take is to utilize the built-in Windows Troubleshooter. This tool is designed to automatically diagnose and resolve common Windows problems.
2. Accessing Windows Troubleshooter:
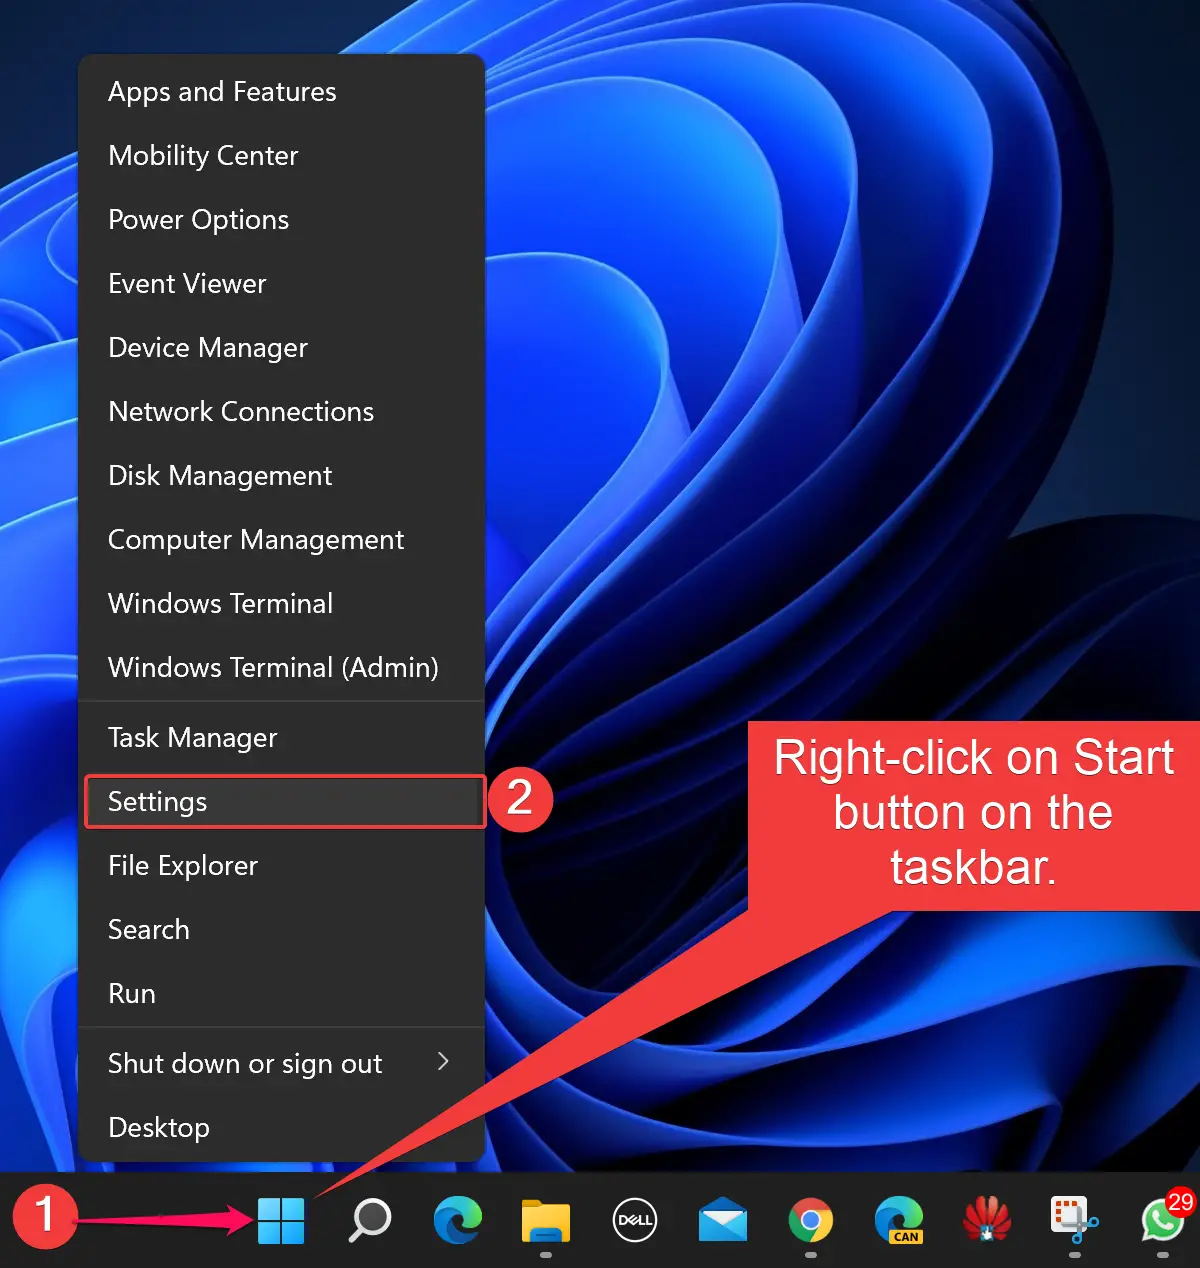
To access the Troubleshooter, go to the Start menu and type “troubleshoot settings” in the search bar. Select the Troubleshoot settings option and then click on “Windows Update” under the Get up and running section. Click on “Run the troubleshooter” to start the diagnostic process.
3. Following the Troubleshooter prompts:
The Troubleshooter will begin scanning your system for any issues related to Windows Update. Follow the on-screen prompts to allow the Troubleshooter to identify and attempt to fix any problems it finds.
4. Running Startup Repair:
If the Troubleshooter does not resolve the issue, you can also try running Startup Repair. This tool can help fix problems that might prevent Windows from starting correctly.
5. Accessing Startup Repair:
To access Startup Repair, restart your computer and press the F8 key repeatedly until the Advanced Boot Options menu appears. Select “Repair your computer” and then choose “Troubleshoot” followed by “Startup Repair.”
6. Following the Startup Repair process:
Startup Repair will attempt to diagnose and fix any issues preventing Windows from starting properly. Follow the on-screen instructions to allow Startup Repair to complete its process.
By utilizing the Windows Troubleshooter and Startup Repair, you can troubleshoot and potentially resolve issues with completing Windows 10 updates.
Managing Software Distribution Folder Contents
To manage software distribution folder contents, follow these steps:
1. Stop Windows Update Service: Press Windows key + R, type “services.msc” and hit Enter. Locate Windows Update, right-click and select Stop.
2. Clear Software Distribution Folder: Go to C:\Windows\SoftwareDistribution\Download and delete all files in this folder.
3. Restart Windows Update Service: Press Windows key + R, type “services.msc” and hit Enter. Locate Windows Update, right-click and select Start.
4. Run Windows Update Troubleshooter: Press Windows key + I to open Settings, go to Update & Security, then select Troubleshoot and run the Windows Update troubleshooter.
5. Reset Windows Update Components: Open Command Prompt as an administrator and run the following commands:
– net stop wuauserv
– net stop cryptSvc
– net stop bits
– net stop msiserver
– ren C:\Windows\SoftwareDistribution SoftwareDistribution.old
– ren C:\Windows\System32\catroot2 catroot2.old
– net start wuauserv
– net start cryptSvc
– net start bits
– net start msiserver
6. Check for Updates: After completing the above steps, check for updates again in Windows Update.
Implementing DISM and SFC Scans
To troubleshoot Windows 10 updates that cannot be completed, you can implement DISM (Deployment Image Servicing and Management) and SFC (System File Checker) scans. These tools can help identify and repair any corrupted system files that may be causing the update issue.
First, open Command Prompt as an administrator by searching for “cmd” in the Windows search bar, right-clicking on Command Prompt, and selecting “Run as administrator.”
Next, run the DISM scan by typing the following command and pressing Enter:
“`
DISM /Online /Cleanup-Image /RestoreHealth
“`
This command will check for and repair any issues with the system image. Once the DISM scan is complete, run an SFC scan by typing the following command and pressing Enter:
“`
sfc /scannow
“`
The System File Checker will scan for and repair any corrupted system files. Once both scans are complete, restart your computer and try installing the Windows 10 updates again.
By implementing these DISM and SFC scans, you can troubleshoot and resolve issues preventing Windows 10 updates from being completed. This can help ensure your operating system is up to date and functioning properly.
System Restoration and App Readiness Activation
System Restoration: If Windows 10 updates cannot be completed, start by performing a system restoration to a point before the issue occurred. This can help undo any recent changes that may be causing the update problem.
App Readiness Activation: After the system restoration, ensure that the App Readiness service is activated. This service is responsible for ensuring that Windows apps are installed and updated correctly. To activate the App Readiness service, go to the Services app, locate the App Readiness service, and make sure it is set to Automatic startup type.
Check Windows Update: Make sure that Windows Update is enabled and functioning properly. Go to Settings > Update & Security > Windows Update and check for any pending updates. If there are updates available, download and install them to see if that resolves the issue.
Run Windows Update Troubleshooter: If the issue persists, run the Windows Update Troubleshooter to diagnose and fix common update problems. Go to Settings > Update & Security > Troubleshoot and select Windows Update from the list of troubleshooters. Follow the instructions to run the troubleshooter and apply any recommended fixes.
Reset Windows Update Components: If the Windows Update Troubleshooter does not resolve the issue, you may need to reset the Windows Update components. Open an elevated Command Prompt (cmd.exe) and run the following commands:
net stop wuauserv
net stop cryptSvc
net stop bits
net stop msiserver
ren C:\Windows\SoftwareDistribution SoftwareDistribution.old
ren C:\Windows\System32\catroot2 catroot2.old
net start wuauserv
net start cryptSvc
net start bits
net start msiserver
Contact Microsoft Support:
Adjusting Automatic Update Settings
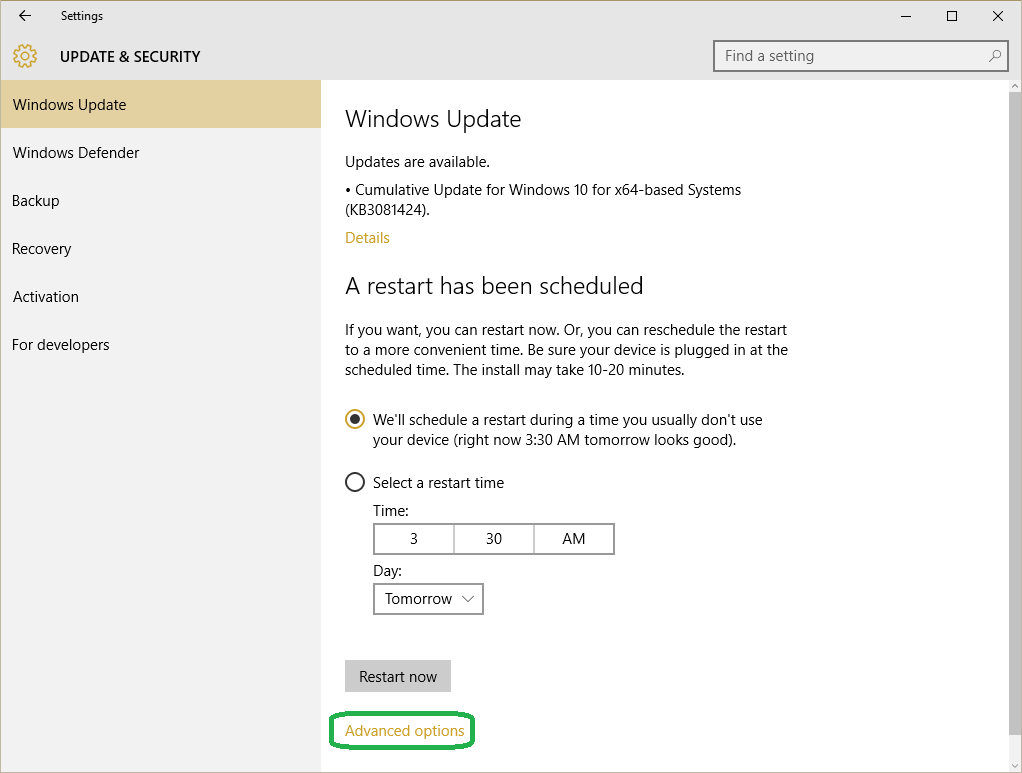
To adjust automatic update settings in Windows 10, follow these steps:
1. Press the Windows key + I to open Settings.
2. Click on Update & Security.
3. Select Windows Update from the left pane.
4. Click on Advanced options.
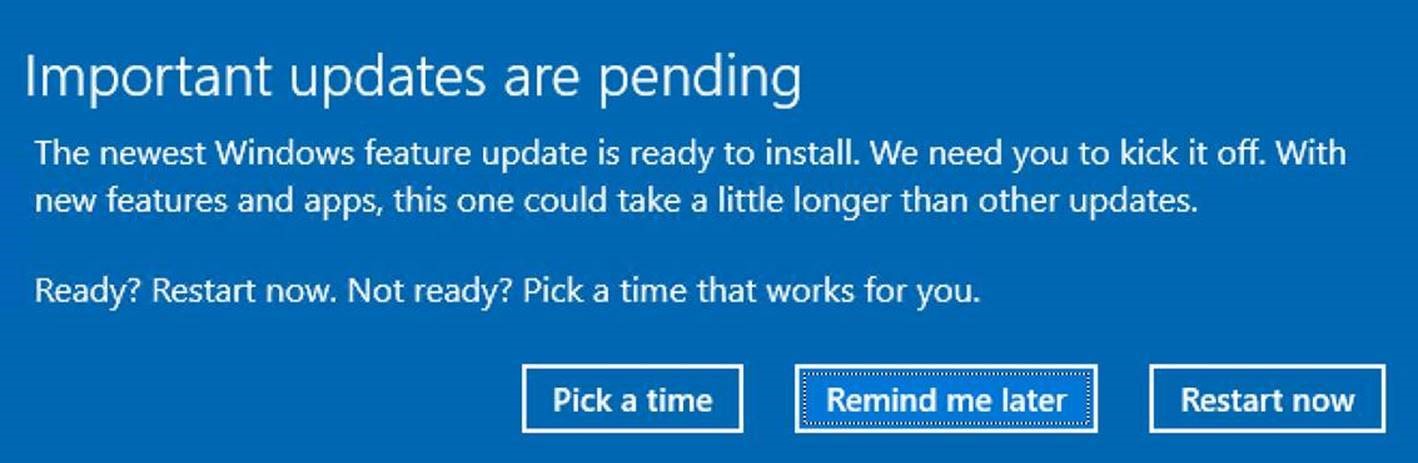
5. Under the “Pause updates” section, use the dropdown menu to select how long you want to pause updates for. This can help troubleshoot issues with updates not completing.
6. Scroll down to the “Choose when updates are installed” section.
7. Use the dropdown menu to select a specific time for updates to be installed. This can help ensure updates are completed successfully.
8. Close the Settings window and restart your computer to apply the changes.
Solutions for System Partition Issues
One common issue that may prevent Windows 10 updates from being completed is system partition problems. Here are some solutions to troubleshoot this issue:
First, try running the built-in Windows Disk Cleanup tool to free up space on your system partition. This can help make room for the update files to be downloaded and installed.
If that doesn’t work, you may need to resize your system partition. To do this, open Disk Management by pressing Windows key + X and selecting “Disk Management.” Right-click on your system partition and choose “Extend Volume” or “Shrink Volume” depending on your needs.
If your system partition is still causing issues, you can try using the Command Prompt to repair any disk errors. Run the command chkdsk C: /f (replace C: with the letter of your system partition) to scan and fix any errors on the disk.
If none of these solutions work, you may need to consider backing up your data and reinstalling Windows 10. This can help resolve any underlying issues with the system partition that are preventing updates from being completed.
Comprehensive PC Reset Options
| Reset Option | Description |
|---|---|
| Refresh your PC | Removes all installed apps and settings, but keeps your personal files intact |
| Reset this PC | Removes all installed apps and settings, and gives you the option to keep or remove your personal files |
| System Restore | Restores your PC to an earlier point in time without affecting your personal files |
| Reinstall Windows 10 | Completely wipes your PC and reinstalls Windows 10 from scratch |
F.A.Q.
How to fix we couldn’t complete the updates in Windows 10?
To fix “We couldn’t complete the updates” in Windows 10, try removing external hardware, updating Windows, uninstalling non-Microsoft antivirus software, uninstalling nonessential software, and freeing up disk space.
Why wont my Windows 10 update complete?
Your Windows 10 update may not be completing because your device does not have enough free space. Windows 10 requires a minimum of 16 GB of free space for a 32-bit OS and 20 GB for a 64-bit OS. Consider inserting a USB drive to provide additional space if needed.
How do I fix Windows 10 after failed update?
To fix Windows 10 after a failed update, you can start by removing nonessential external hardware like docks and USB devices. Then, check the system drive for errors and try to repair them. Running the Windows Update troubleshooter and attempting to restore and repair system files may also help resolve the issue.
Why do my updates keep failing Windows 10?
Your updates may be failing on Windows 10 due to corrupted system files. To resolve this issue, you can use the system file checker to find and repair any errors. Simply follow the steps to run SFC and DISM commands for a smooth resolution.
