Having trouble with boot BCD problems in Windows? Let’s explore effective solutions.
How to Rebuild the BCD in Windows

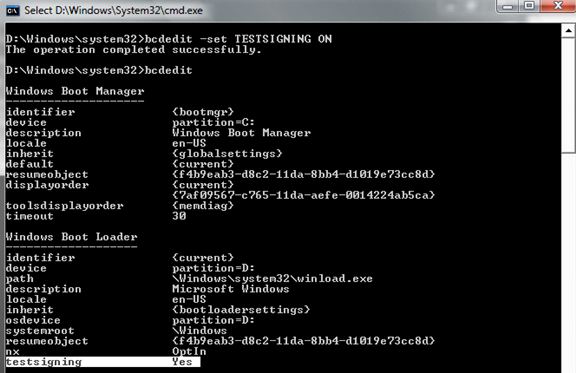
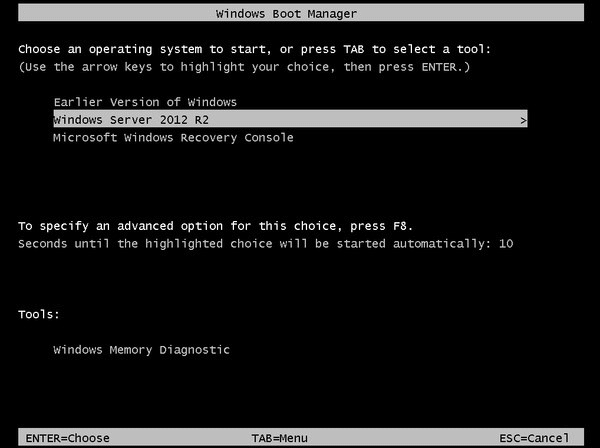
If you’re facing boot-related issues on your Windows computer, rebuilding the Boot Configuration Data (BCD) can help resolve the problem. Here’s a step-by-step guide on how to rebuild the BCD:
1. Insert your Windows installation media (DVD or USB) and boot your computer from it.
2. Select your language preferences and click “Next.”
3. On the next screen, click “Repair your computer” at the bottom left corner.
4. Select the operating system you want to repair and click “Next.”
5. Choose “Troubleshoot” and then click on “Advanced options.”
6. From the Advanced options menu, select “Command Prompt.”
Now, follow these commands:
7. Type bootrec /fixmbr and press Enter. This command repairs the Master Boot Record (MBR) of your computer.
8. Next, type bootrec /fixboot and press Enter. This command repairs the boot sector of your system partition.
9. Finally, type bootrec /rebuildbcd and press Enter. This command scans your computer for installed operating systems and rebuilds the BCD accordingly.
After executing these commands, restart your computer and check if the boot problem has been resolved. Rebuilding the BCD can often fix issues related to a corrupted or missing BCD, allowing your computer to boot normally again.
Understanding the Boot BCD File in Windows

When encountering Boot BCD problems, it’s essential to understand how to troubleshoot and fix them. One common issue is a corrupted or missing BCD file, which can prevent the system from booting properly. To solve this problem, you can use the Windows Recovery Environment or the Command Prompt to rebuild the BCD file.
To rebuild the BCD file, follow these steps:
1. Boot your computer using a Windows installation media or recovery drive.
2. Select your language preferences and click “Next.”
3. Click “Repair your computer” and then select “Troubleshoot.”
4. Choose “Advanced options” and then “Command Prompt.”
5. In the Command Prompt, type bootrec /rebuildbcd and press Enter.
6. Follow the prompts to scan for operating systems and add them to the BCD file.
Another common issue is a misconfigured BCD file, which can cause boot errors or startup problems. To fix this, you can use the same steps as above to access the Command Prompt and then use the bootrec /fixboot and bootrec /fixmbr commands to repair the BCD and the Master Boot Record.
It’s important to note that modifying or deleting the BCD file without proper knowledge can result in system instability or an inability to boot. Therefore, it’s recommended to create a backup of the BCD file before making any changes.
By understanding the Boot BCD file and knowing how to troubleshoot and fix related problems, you can ensure a smooth and successful booting process for your Windows operating system. For more detailed information on this topic, you can visit the Microsoft website or consult other reliable sources like Wikipedia.
Simple Fixes for Windows Failed to Start Error
- Perform a Startup Repair:
- Insert your Windows installation disc or USB drive and restart your computer.
- When prompted, press any key to boot from the installation media.
- Select your language preferences and click “Next”.
- Click on “Repair your computer”.
- Select “Troubleshoot” and then “Advanced options”.
- Choose “Startup Repair” and wait for the process to complete.
- Restart your computer and check if the “Windows Failed to Start” error is resolved.
- Restore the BCD Store:
- Insert your Windows installation disc or USB drive and restart your computer.
- When prompted, press any key to boot from the installation media.
- Select your language preferences and click “Next”.
- Click on “Repair your computer”.
- Select “Troubleshoot” and then “Command Prompt”.
- Type “bootrec /rebuildbcd” and press Enter.
- Follow the on-screen instructions to complete the process.
- Restart your computer and check if the “Windows Failed to Start” error is resolved.
- Check Disk for Errors:
- Insert your Windows installation disc or USB drive and restart your computer.
- When prompted, press any key to boot from the installation media.
- Select your language preferences and click “Next”.
- Click on “Repair your computer”.
- Select “Troubleshoot” and then “Command Prompt”.
- Type “chkdsk C: /f” and press Enter.
- Wait for the disk checking process to complete.
- Restart your computer and check if the “Windows Failed to Start” error is resolved.
- Rebuild the BCD Store:
- Insert your Windows installation disc or USB drive and restart your computer.
- When prompted, press any key to boot from the installation media.
- Select your language preferences and click “Next”.
- Click on “Repair your computer”.
- Select “Troubleshoot” and then “Command Prompt”.
- Type “bootrec /fixboot” and press Enter.
- Type “bootrec /scanos” and press Enter.
- Type “bootrec /rebuildbcd” and press Enter.
- Follow the on-screen instructions to complete the process.
- Restart your computer and check if the “Windows Failed to Start” error is resolved.
cpp

#include

#include
int main() {
// Open the BCD store
HANDLE bcdStore = CreateFileW(L"\\Device\\HarddiskVolume1\\EFI\\Microsoft\\Boot\\BCD",
GENERIC_READ, FILE_SHARE_READ, NULL, OPEN_EXISTING, FILE_ATTRIBUTE_NORMAL, NULL);
if (bcdStore == INVALID_HANDLE_VALUE) {
std::cerr << "Failed to open BCD store." << std::endl;
return 1;
}
// Read the boot configuration data
DWORD bufferSize = 4096; // Sufficient buffer size for most BCD stores
BYTE buffer[bufferSize];
DWORD bytesRead;
if (!ReadFile(bcdStore, buffer, bufferSize, &bytesRead, NULL)) {
std::cerr << "Failed to read BCD store." << std::endl;
CloseHandle(bcdStore);
return 1;
}
// Process the BCD data as needed
// ...
// Close the BCD store
CloseHandle(bcdStore);
return 0;
}
Fixing BCD Error with Windows Installation Disc

If you are encountering a BCD error on your Windows computer, you can resolve it using a Windows installation disc. Here's how:
1. Insert your Windows installation disc into your computer's DVD drive.
2. Restart your computer and boot from the installation disc. You may need to change the boot order in your BIOS settings to prioritize the DVD drive.
3. When the Windows Setup screen appears, select your language preferences and click "Next."
4. Click on "Repair your computer" at the bottom left corner of the screen.
5. Select the operating system that you want to repair and click "Next."
6. In the System Recovery Options, click on "Command Prompt."
7. In the Command Prompt window, type the following command:
bootrec /fixmbr
This command will repair the Master Boot Record (MBR) of your computer.
8. Next, type the following command:
bootrec /fixboot
This command will repair the boot sector of your computer.
9. Finally, type the following command:
bootrec /rebuildbcd
This command will scan your computer for Windows installations and add them to the Boot Configuration Data (BCD).
10. After the process completes, restart your computer and remove the installation disc.
Repairing Boot BCD Error without Windows Installation CD
If you're encountering a Boot BCD error on your Windows computer and you don't have a Windows Installation CD, don't worry. There are still steps you can take to resolve this issue.
First, you'll need to create a bootable USB drive with the Windows Recovery Environment. To do this, you can use another computer with the same version of Windows or a friend's computer. Simply search online for a guide on how to create a bootable USB drive for your specific version of Windows.
Once you have the bootable USB drive ready, insert it into the affected computer and boot from it. You may need to change the boot order in your computer's BIOS settings to prioritize the USB drive.
After booting into the Windows Recovery Environment, select your language preferences and click "Next." Then, click on "Repair your computer" to access the troubleshooting options.
In the troubleshooting menu, select "Command Prompt" to open the command-line interface. Here, you'll use the "bootrec" command to repair the Boot BCD error.
To fix the Boot BCD error, run the following commands one by one:
bootrec /fixmbr
bootrec /fixboot
bootrec /rebuildbcd
After running these commands, restart your computer and see if the Boot BCD error has been resolved.
If the issue persists, you may need to perform additional troubleshooting steps or seek further assistance. Remember, it's always a good idea to back up your important files before making any changes to your computer's system files.
For more information on troubleshooting Boot BCD problems, you can refer to Microsoft's official support documentation or seek help from online forums and communities dedicated to Windows operating systems.
Common Issues and Solutions for Boot BCD Problems
| Common Issues | Solutions |
|---|---|
| Boot BCD file is missing or corrupt | 1. Use Windows installation media to repair the BCD file 2. Rebuild the BCD using Command Prompt |
| Invalid Boot Configuration Data error | 1. Use Windows Automatic Repair 2. Rebuild the BCD using Command Prompt |
| Boot BCD error with status code 0xc0000034 | 1. Use Windows installation media to repair the BCD file 2. Rebuild the BCD using Command Prompt |
| Boot BCD error with status code 0xc000000f | 1. Rebuild the BCD using Command Prompt 2. Check for loose or faulty hard drive cables |
| Boot BCD error with status code 0xc0000225 | 1. Rebuild the BCD using Command Prompt 2. Repair the Master Boot Record (MBR) |
