Unlocking the potential of your hard drive can be frustrating when the “Extend Volume” option remains stubbornly inaccessible. In this article, we delve into the common reasons behind the greyed-out dilemma and provide expert solutions to effortlessly tackle this issue in Windows 11/10/8/7.
Understanding the “Extend Volume Greyed Out” Issue
If you’re experiencing the “Extend Volume Greyed Out” issue in Windows 11/10/8/7, here are some steps to fix it.
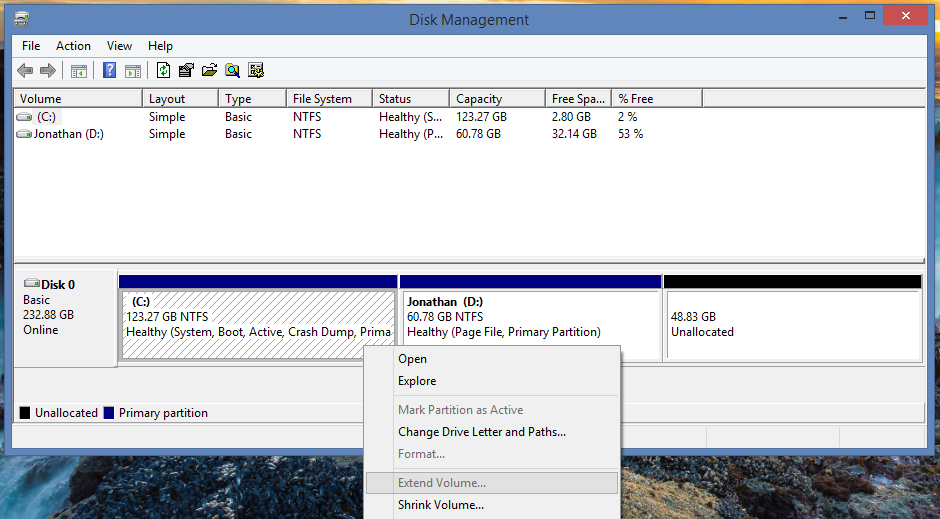
First, open the Windows Disk Management tool.
Next, locate the volume or partition that you want to extend.
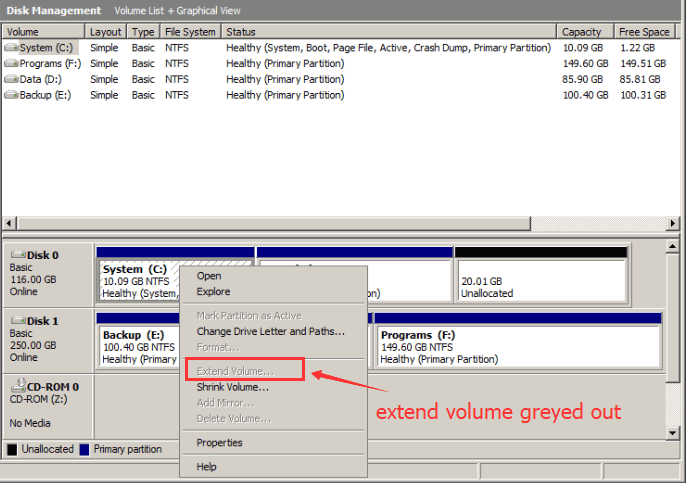
Right-click on the volume and select the “Extend Volume” option.
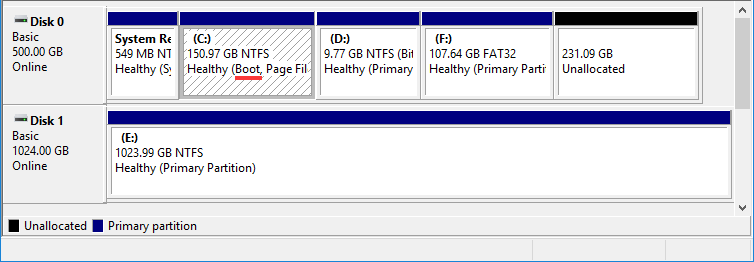
If the “Extend Volume” option is greyed out, it could be due to several reasons, such as the volume being a FAT or system partition, insufficient disk space, or unallocated space not adjacent to the target partition.
To fix this, you can try the following solutions:
1. Resize the adjacent partition to create unallocated space next to the target partition. Then, you can use the “Extend Volume” option.
2. Use a third-party partition manager tool like MiniTool Partition Wizard to extend the volume.
3. If the volume is a system partition or contains the operating system, you may need to use command-line tools or a Windows installation disk to extend the volume.
Methods to Fix the “Extend Volume Greyed Out” Error
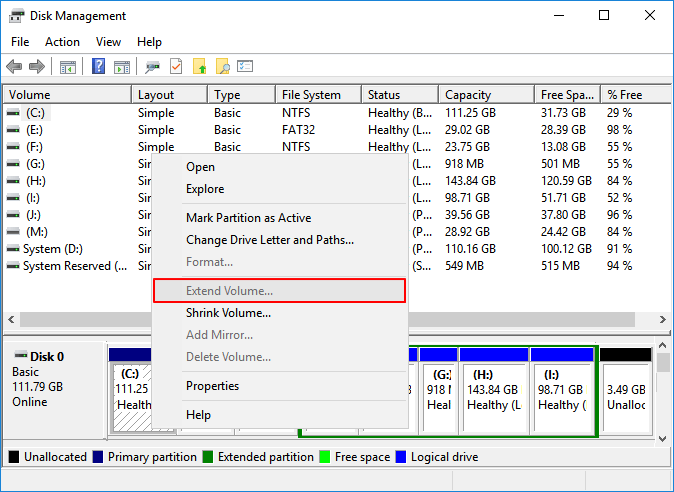
- Open Disk Management by pressing Windows + X and selecting Disk Management from the menu.
- Right-click on the volume you want to extend and select Shrink Volume.

- Enter the amount of space to shrink in MB and click Shrink.
- Now, right-click on the unallocated space created and select New Simple Volume.
- Follow the on-screen instructions to create a new volume.
- Once the new volume is created, right-click on the original volume and select Extend Volume.
- Follow the on-screen instructions to extend the volume using the unallocated space.
- The “Extend Volume” option should now be available and not greyed out.
Method 2: Fix Extend Volume Greyed Out Using DiskPart
- Open Command Prompt as an administrator by pressing Windows + X and selecting Command Prompt (Admin).
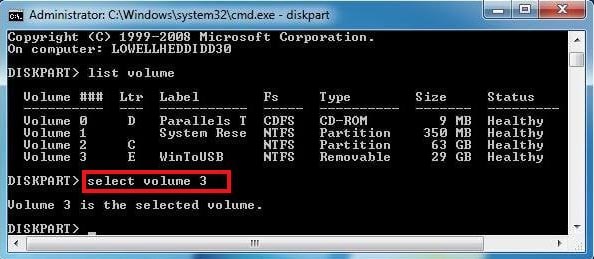
- Type diskpart and press Enter to open the DiskPart utility.
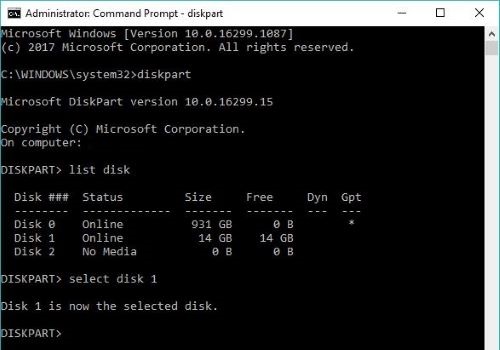
- Type list volume and press Enter to view the list of volumes on your computer.
- Identify the volume you want to extend and note its volume number.
- Type select volume X (replace X with the volume number) and press Enter.
- Type extend size=desired size in MB and press Enter (e.g., extend size=20480).
- The selected volume should now be extended, and the “Extend Volume” option should no longer be greyed out.
Method 3: Fix Extend Volume Greyed Out Using Third-Party Partition Manager
- Download and install a reliable third-party partition manager tool such as MiniTool Partition Wizard or AOMEI Partition Assistant.
- Launch the partition manager tool.
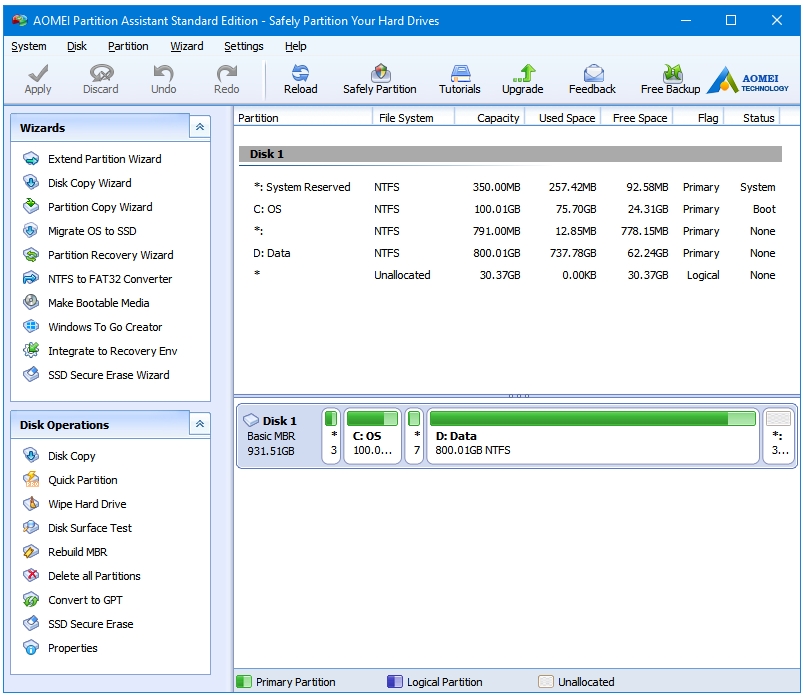
- Select the volume you want to extend.
- Choose the option to extend the volume and specify the desired size.
- Follow the on-screen instructions to complete the volume extension process.
- After the process is completed, the “Extend Volume” option should be enabled and no longer greyed out.
Fixing the Issue without Unallocated Space
To fix the “Extend Volume” option being greyed out in Windows 11/10/8/7, follow these steps:
1. Open Windows Disk Management by pressing Win + X and selecting “Disk Management” from the menu.
2. Locate the volume that you want to extend (e.g., C drive) and check if there is unallocated space next to it.
3. If there is no unallocated space, you can create some by shrinking an existing partition. Right-click on a partition with enough free space and select “Shrink Volume.” Enter the amount of space to shrink and click “Shrink.”
4. Once you have unallocated space, right-click on the volume you want to extend and select “Extend Volume.”
5. In the Extend Volume Wizard, specify the amount of space you want to add and click “Next.”
6. Review the changes and click “Finish” to extend the volume and fix the issue.
Fixing the Issue with No Adjacent Unallocated Space
If you’re experiencing the issue of no adjacent unallocated space when trying to extend a volume in Windows 11/10/8/7, there are some steps you can take to fix it.
Step 1: Open the Disk Management console by right-clicking on the Start button and selecting “Disk Management” from the menu.
Step 2: Locate the volume that you want to extend and check if there is any unallocated space available next to it. If not, you’ll need to create some by shrinking an existing partition or deleting a partition with data you no longer need.
Step 3: Right-click on the volume you want to extend and select “Extend Volume” from the context menu.
Step 4: Follow the on-screen instructions to extend the volume using the available unallocated space.
Fixing the Issue on Different Partition Formats
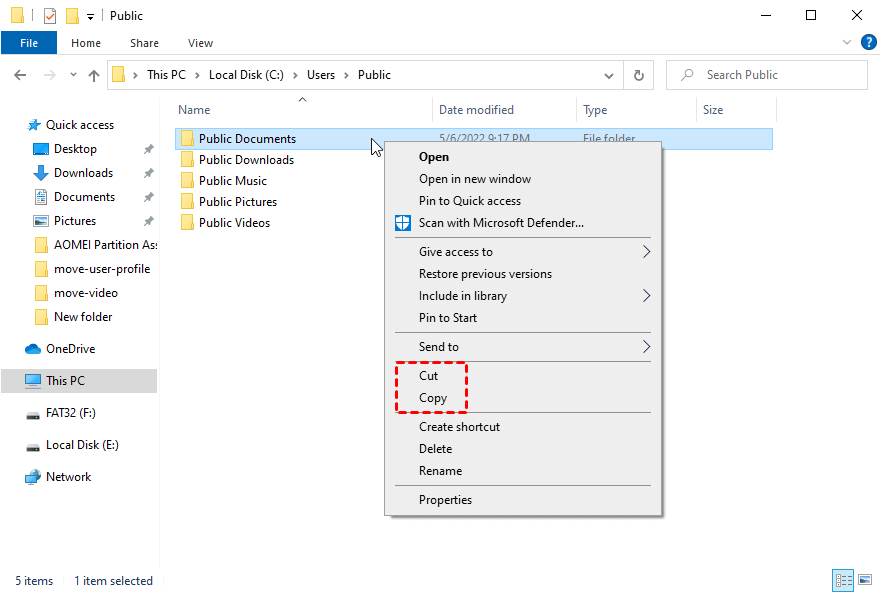
- Open File Explorer.
- Right-click on the partition you want to extend and select Properties.
- In the General tab, check the File system and make sure it is NTFS.
- If the file system is FAT32 or exFAT, you need to convert it to NTFS.
- Open Command Prompt with administrator privileges.
- Type the command convert [drive letter]: /fs:ntfs and press Enter.
![Open Command Prompt with administrator privileges.
Type the command convert [drive letter]: /fs:ntfs and press Enter.](/posts/open-command-prompt-with-administrator-privileges-type-the.png)
- Follow the on-screen instructions to complete the conversion process.
Repair Method 2: Delete Volume
- Open Disk Management.
- Right-click on the partition you want to extend and select Delete Volume.
- Confirm the deletion when prompted.
- Right-click on the unallocated space created and select New Simple Volume.
- Follow the on-screen instructions to create a new partition.
Repair Method 3: Use Third-Party Partition Manager
- Download and install a reputable third-party partition manager software.
- Launch the partition manager.

- Select the partition you want to extend.
- Choose the Extend Partition option.
- Specify the amount of space you want to add to the partition.
- Follow the on-screen instructions to complete the partition extension process.

Troubleshooting Common Questions about Extending C Drive
| Common Questions | Troubleshooting Steps |
|---|---|
| Why is the “Extend Volume” option greyed out? |
|
| Can I extend the C drive using third-party software? |
Yes, there are several third-party disk management tools available that provide options to extend the C drive even when the native Windows Disk Management tool fails. Some popular options include:
Make sure to choose a reliable and trusted software, and always back up your data before performing any disk management operations. |
| Are there any risks involved in extending the C drive? |
Extending the C drive can be a safe operation if done correctly. However, there are potential risks involved:
It is recommended to consult professional assistance if you are unsure or unfamiliar with disk management procedures. |